It is time to start a new chapter in the orrery etching saga. To wrap up the last installment the challenge was not the etching per se but the ink transfer to the brass. The best reference I found on the web implied that it was necessary to not only apply heat, but also pressure. In addition a significant amount of experimentation is required to get your results to be consistent. The biggest problem I had each time a transfer was attempted was spots of ink that did not transfer. When I attempted to apply pressure by bearing down on the iron the transfer was good on one side and poor on the other. I attribute this to uneven pressure.
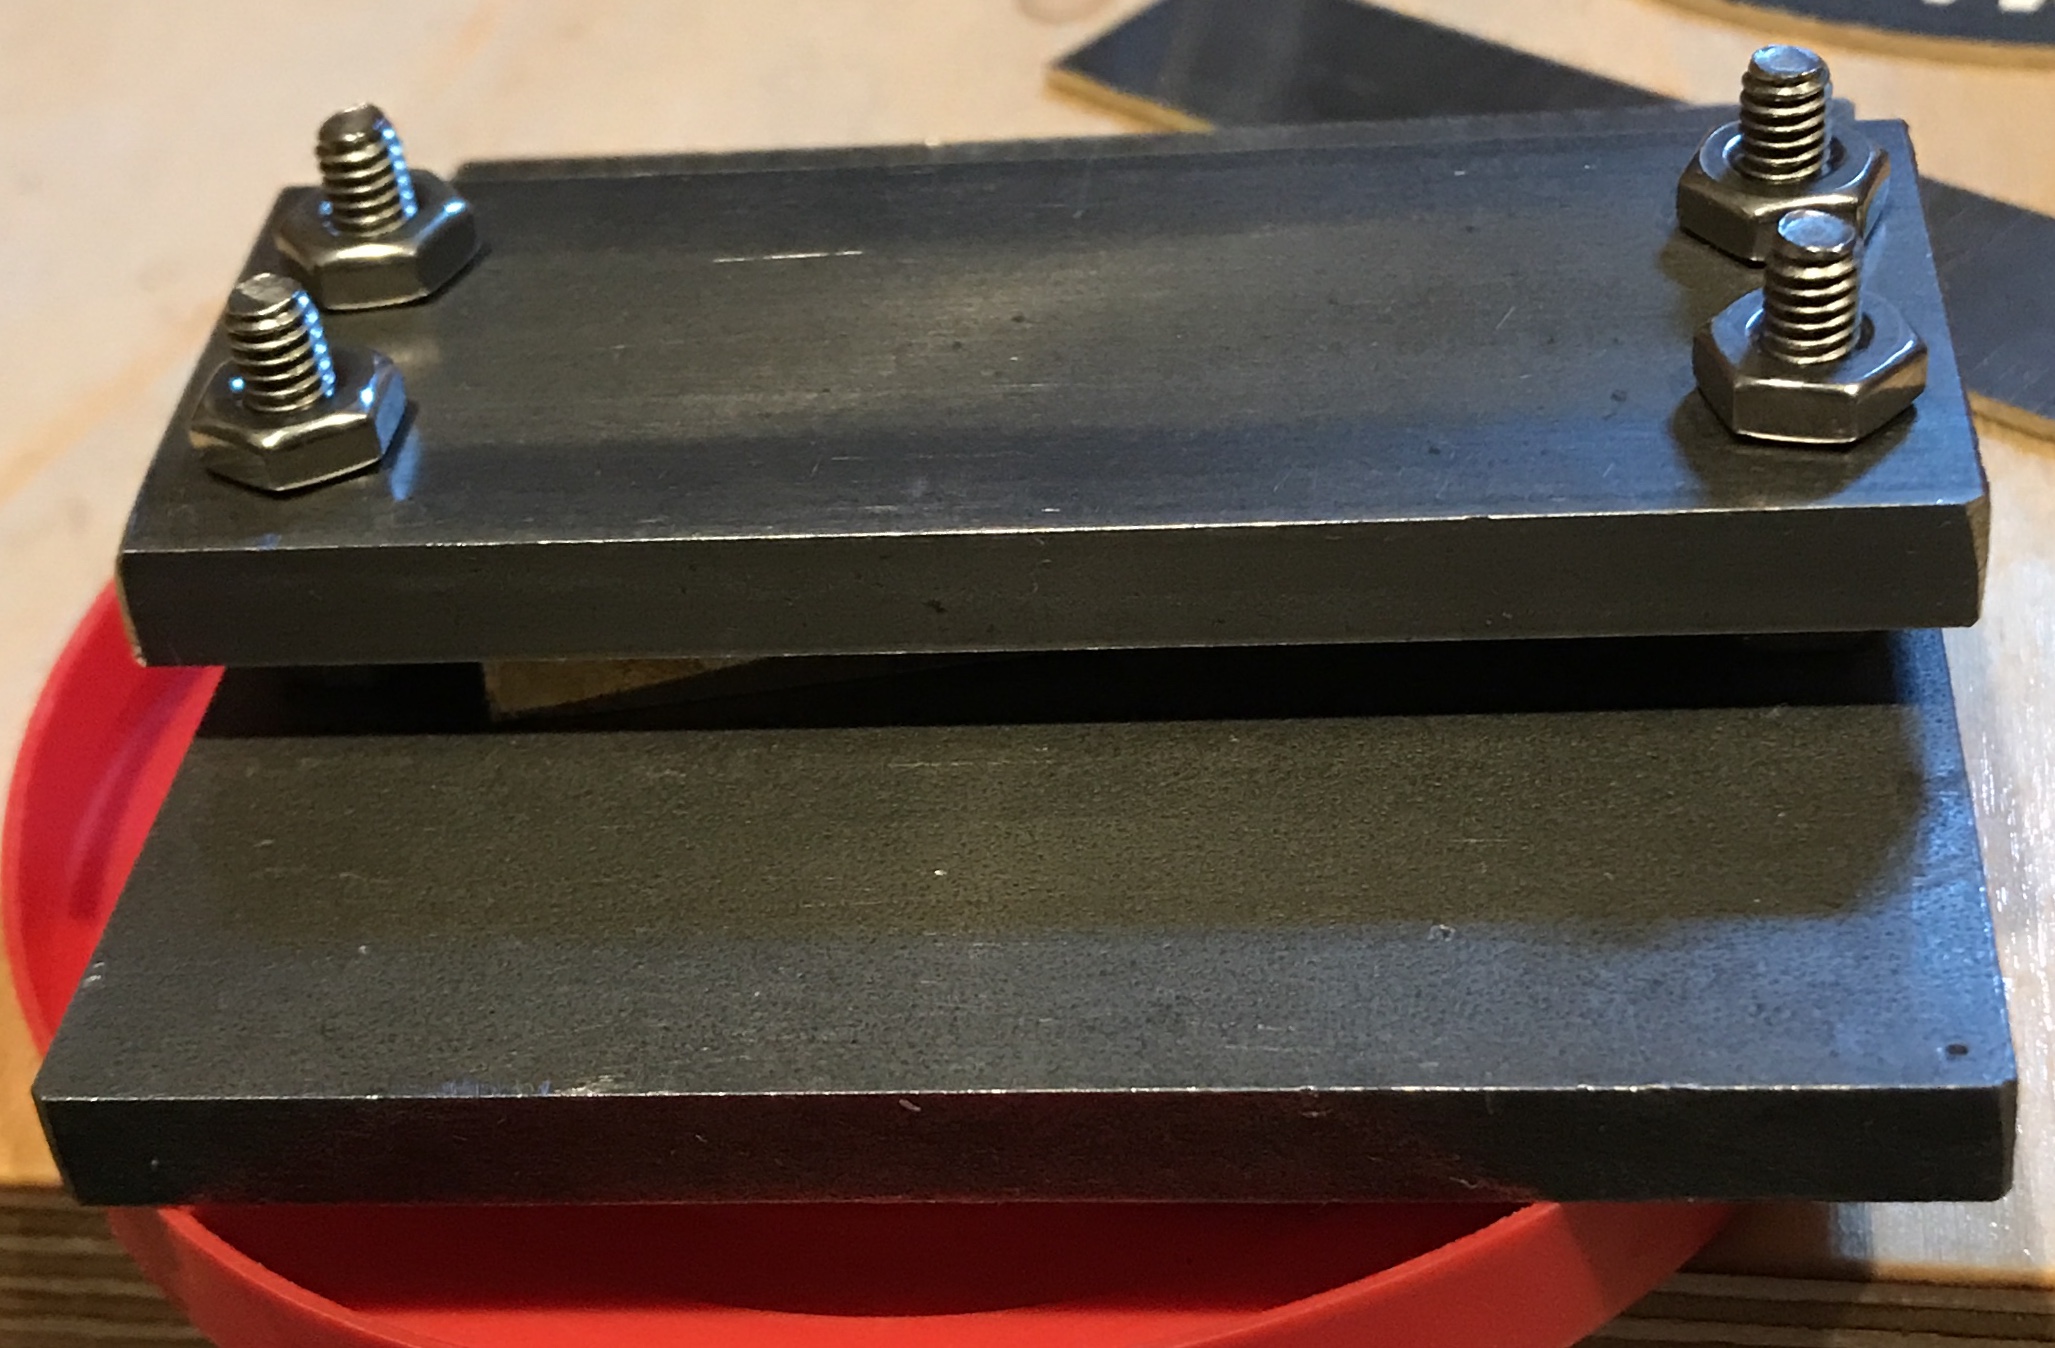
I decided to make a jig that would hold the heat and apply the needed pressure to the part. I will need a pretty large jig eventually to transfer ink to the dodecagon, but a smaller version should suffice for the experimentation phase. A 1/4" X 3" X 3" steel plate was found in the bin. A 1/4 X 1 1/4" bar was also located. Four holes were drilled #29 and tapped 8-32 in the plate. They were drilled 1/4" from one edge and 1 3/16" from the orthogonal edge. These holes were transferred to a piece of the bar that was cut off with a hacksaw at 3" long. The four holes in the bar were drilled with a #10 drill. After cleaning up both parts four screws were put through the plate. These screws were locked in place with four nuts. The bar was put in place and four more nuts were put on the screws to add clamping pressure to anything between the bar and the plate. The picture below shows the completed jig. A piece of brass is barely visible between the bar and plate.
The recommended temperature is 140-150° C or 284-302° F. It should be easy enough to heat up the grill to 300°, place the jig into the grill for 10-15 minutes, remove it, and clamp in a piece of brass with an inked piece of acetate taped on. The grill was heated to 300°. This meant only the center burner was on and the center knob was set at about 3:45 or covering the fifth bar. The jig was placed in the grill where it sat for 15 minutes. The jig was removed and the brass was placed in the center of the jig. The jig was tightened and placed back in the grill. After two minutes the brass was removed from the jig and laid next to the grill to cool. When it was cool to the touch (the jig was still hot) the tape was removed. The picture below shows the result. It is a very uniform coating of ink. There are, however, spots where no ink transferred. The brass was cleaned with acetone just prior to taping on the acetate. Could it be dust particles on the printout?
A second attempt after dusting the acetate and the brass with a small paintbrush went similarly to the first. The picture below shows that there are fewer spots where ink did not transfer. However, the center of the transfer did not go well. This may be a result of clamping only at the ends of the part or I may not have tightened the nuts enough. I will make a third attempt with a machinists clamp in the middle.
Third (or maybe 10th) time is a charm. This time both the jig and the machinist's clamp were heated in the grill for 15 minutes. The brass with taped acetate was inserted into the jig (ink side against the plate). The nuts were tightened and the clamp was applied and also tightened. The whole was put into the grill for two minutes. After removing the jig from the grill, the clamp was removed and the nuts loosened. The brass was removed and allowed to cool sitting on the metal table. The picture below shows the success! Few dots and sharp letters! Time to purchase the plate for the full size jig. In the meantime there are other parts of the orrery that need work as well.
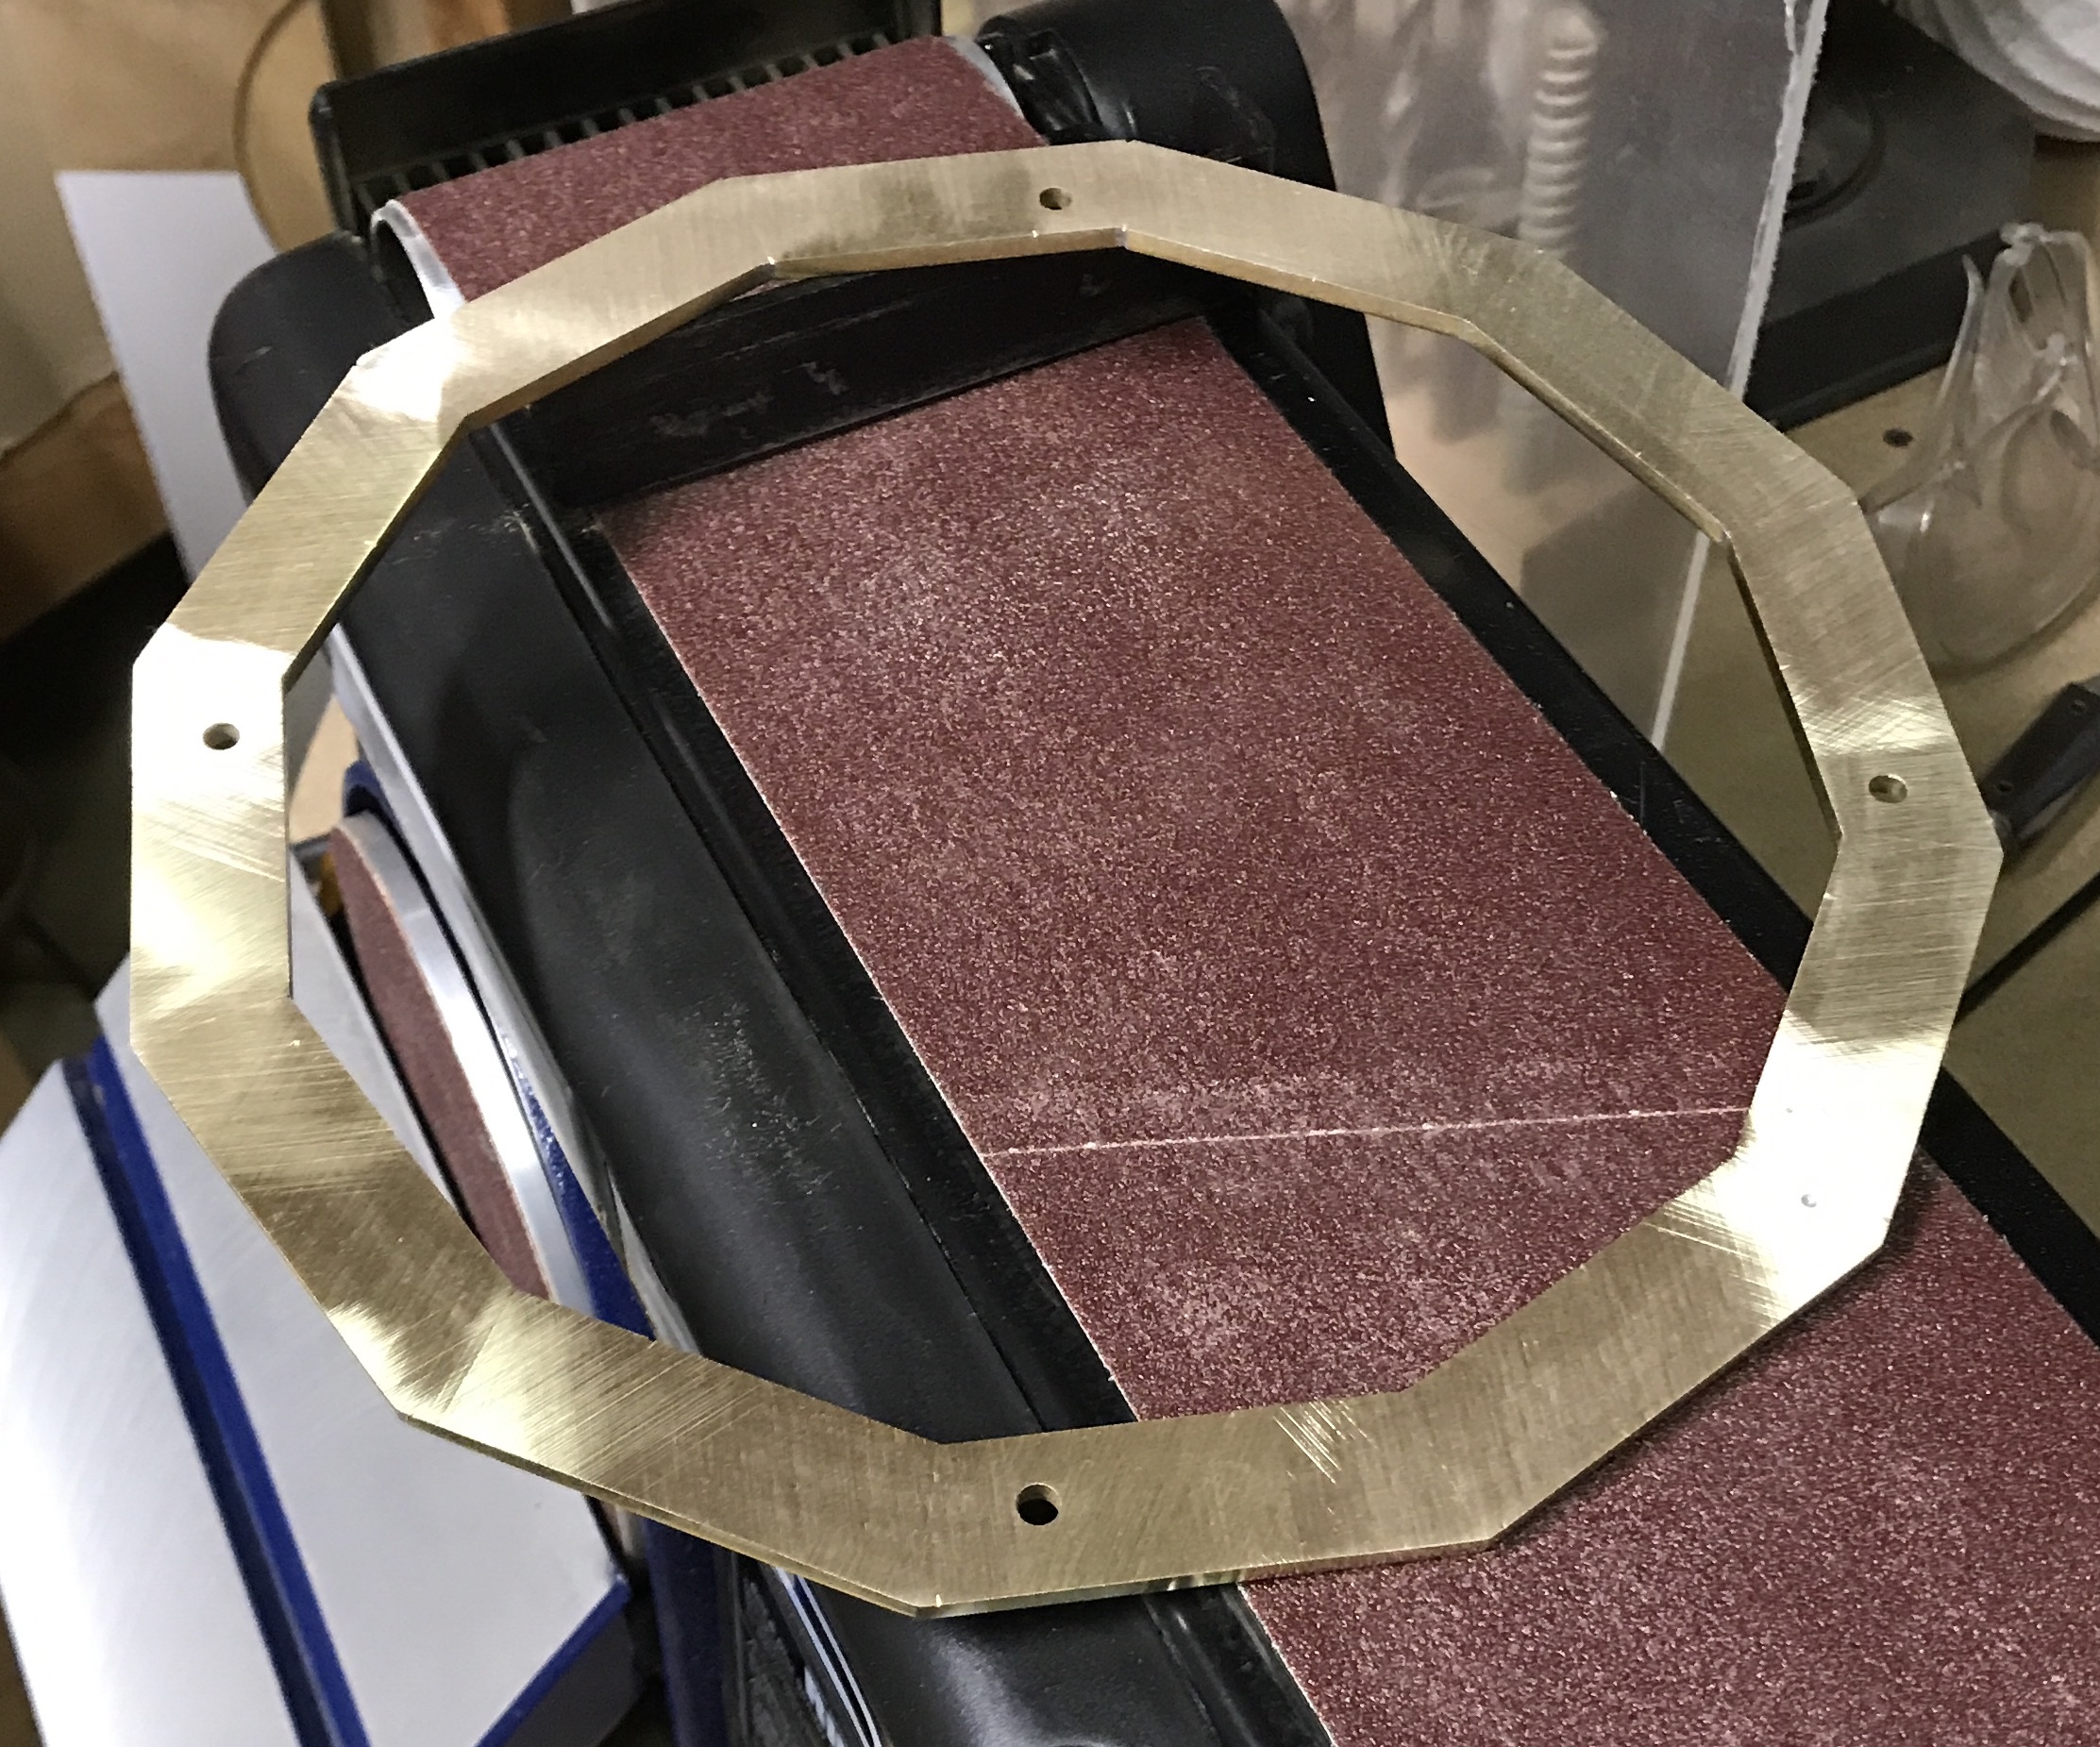
Upon further study of the orrery I realized that the top dodecagon cannot be flipped over to use the backside for etching. The central bar is attached on the bottom and it is not symmetric as it has two holes. One is offset from center. This hole supports the driving gear stack and is offset to provide room for the worm. Etching the top of this dodecagon where it has already been engraved will require a significant amount of sanding. I had a dodecagon part that had the stars drilled into it. It took two or three minutes of sanding to remove them. The thickness decreased from 0.188" to about 0.160". It was much quicker than expected using the belt sander. The dodecagon currently has a coat of varnish that needs to be removed first so it won't clog the sandpaper. The varnish was removed with acetone. The sanding went quite well. Two sections were sanded at a time, because two were on the belt at a time. After about 15 minutes of sanding the engraving, stars and most of the division lines were removed as shown in the picture below.
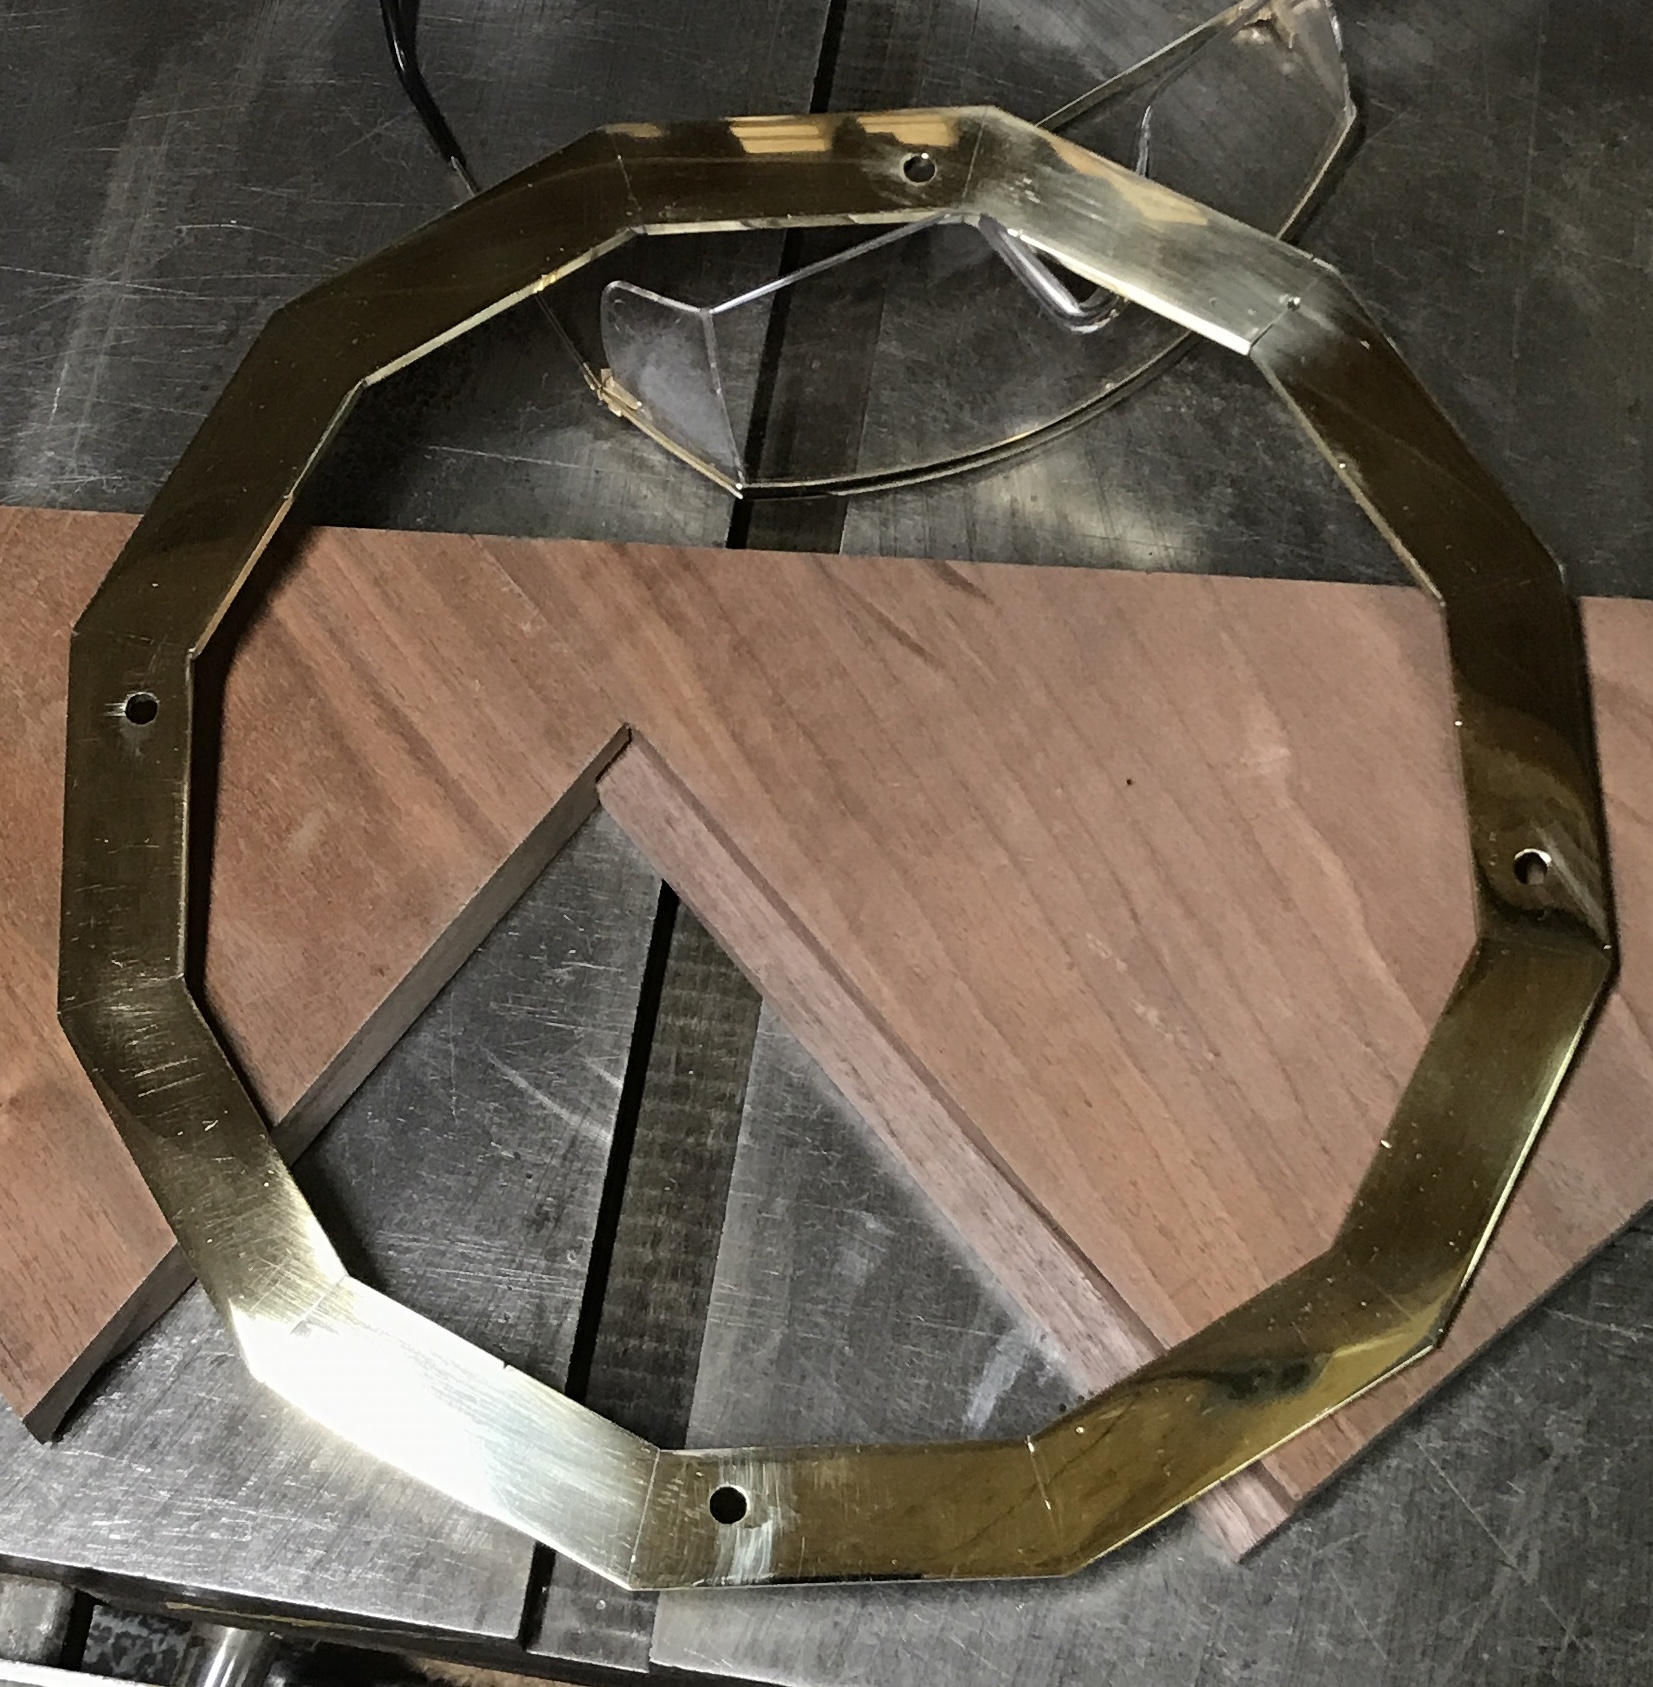
Sanding out the 80-grit scratches was challenging. I tried the detail sander with 150 grit and then the random orbit sander with 150 grit. They got rid of about 80% of the scratches. The rest were removed by hand with 150 grit paper. Worked up a sweat and there are many grits to go! This morning started with more sanding. The sanding began with 220, 320, and 400 grit paper. Each section took 75 to 100 strokes. After a break I finished with 600, 1000, and 1500 grit paper. I don't have any 2000 or that would have been used as well. The back was also sanded, but only to 600 grit. The dodecagon was then polished on the buffer with red rouge. After cleaning with soap and water there are a few spots on the top (especially around the holes) that need further polishing. The bottom was also polished and it has more rough spots remaining than the top, but is not bad. A photo of the top of the dodecagon at this preliminary polish stage is below.
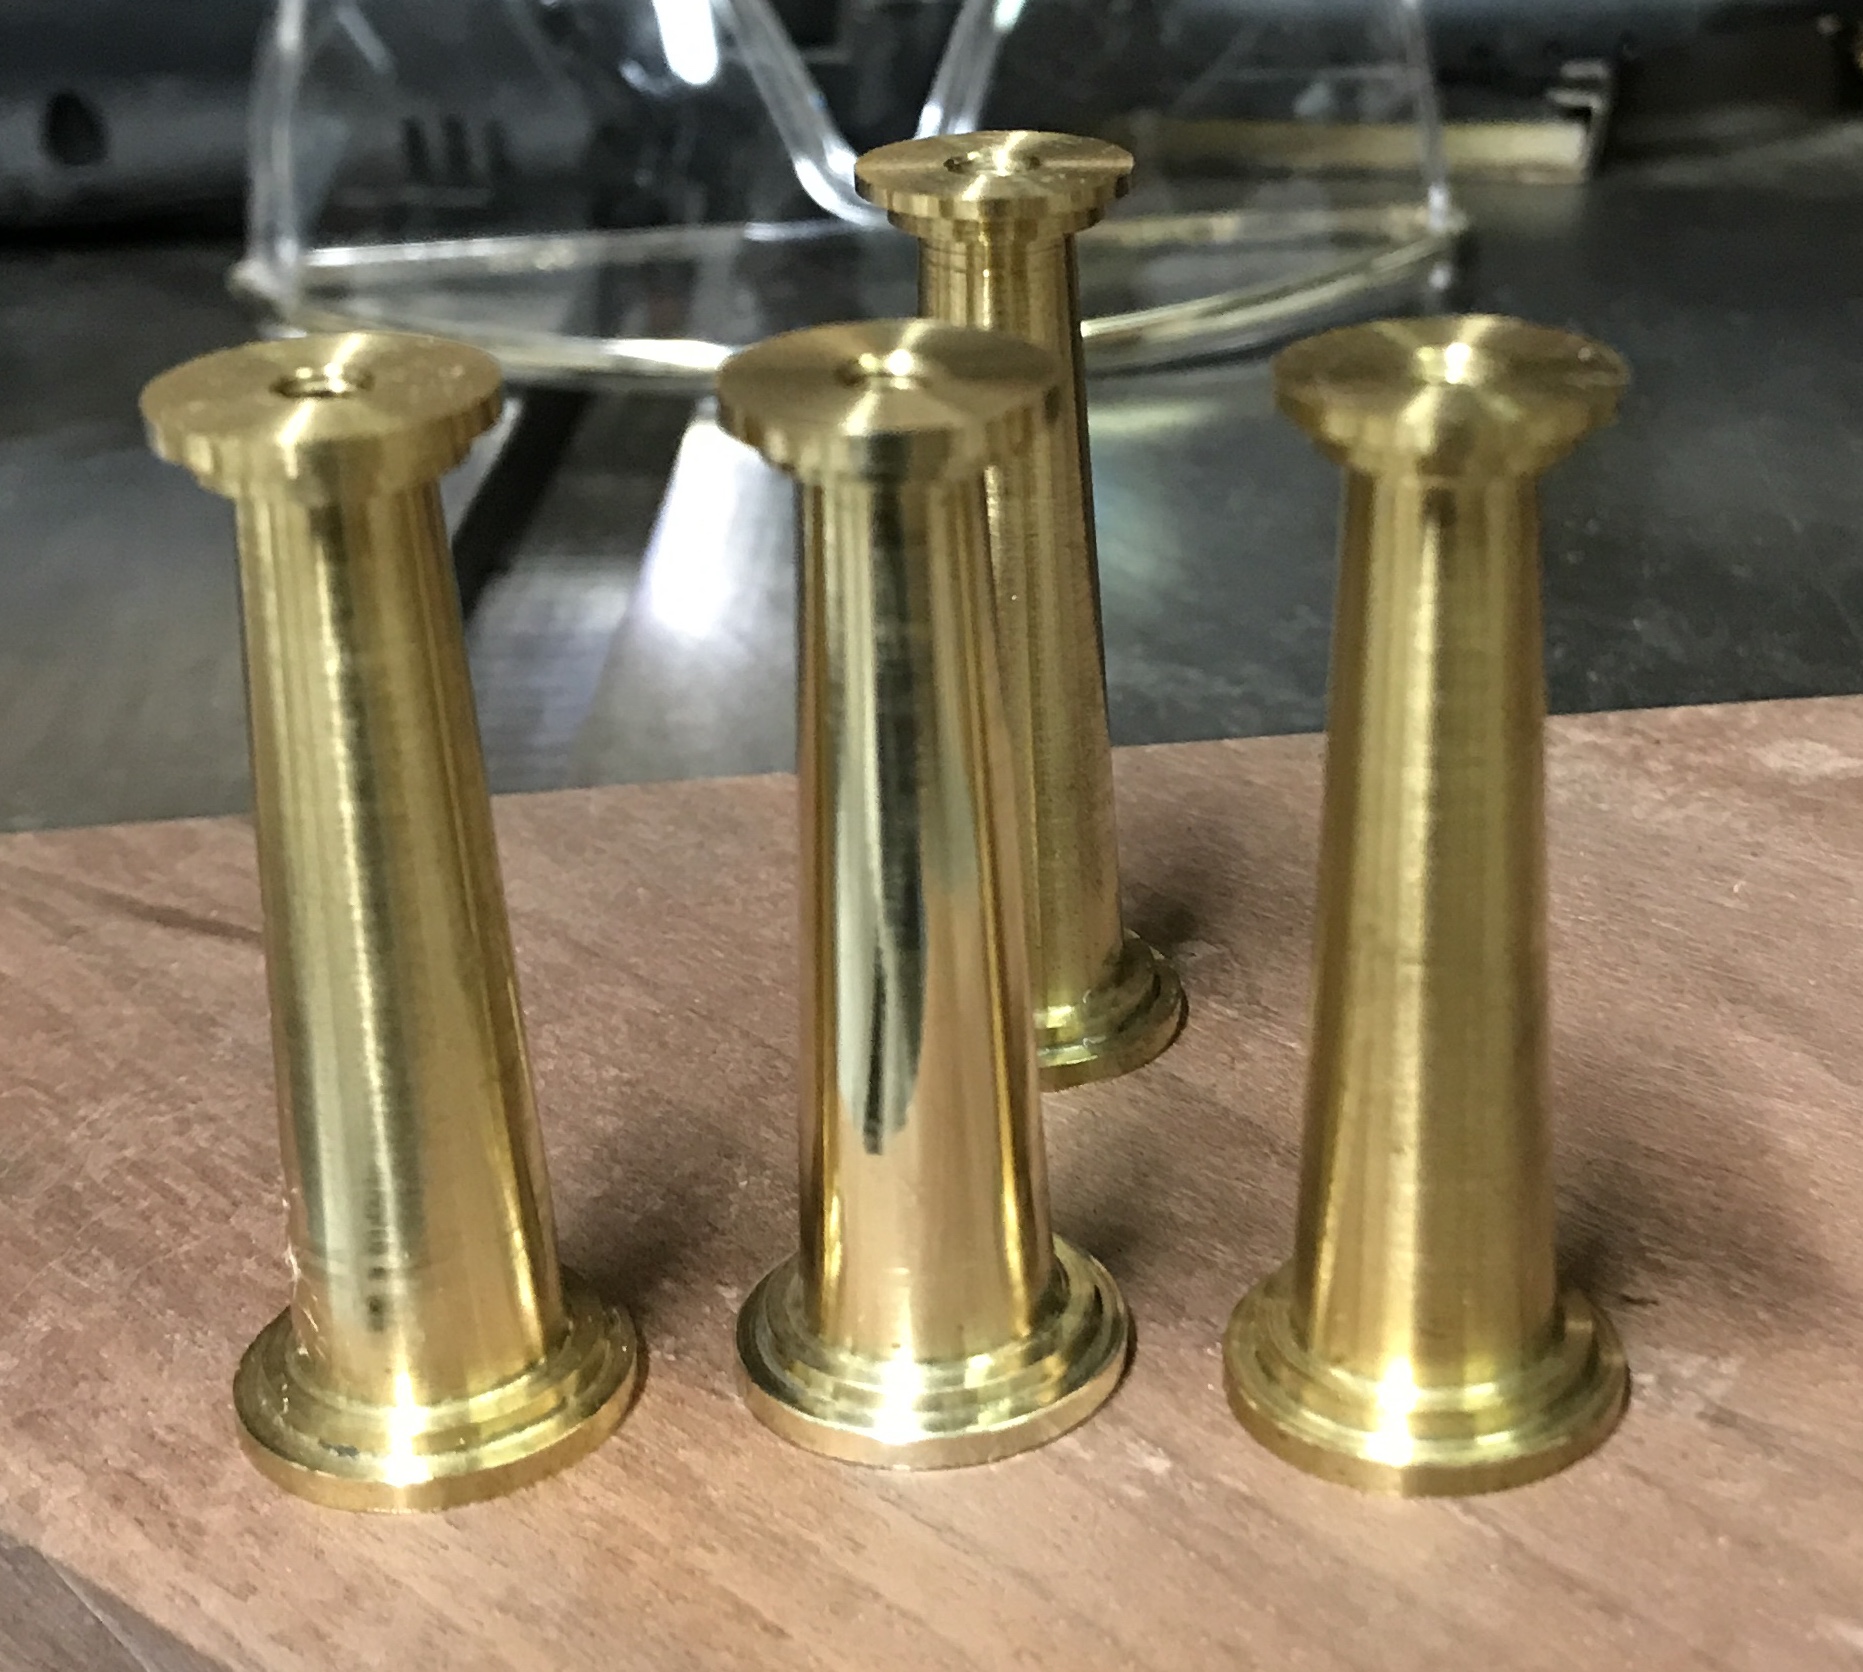
All of the parts of the orrery need to be polished (or repolished). I removed the columns as a sample of what needs to be done. The first column I started polishing started turning blue when polishing. I assumed I had put varnish on it. I cleaned all four columns with acetone. I then polished one of the columns. There was a lot of the black gunk left on the column after polishing. This was washed off with soap and water. A brush was used to get into the corners at the base and top. The photo below shows the difference between the polished and unpolished columns.
There is no point to polishing now unless the parts are painted with the new varnish, before they tarnish. Once I have some experience I will be in a position to polish, etch as needed, clean, and varnish each part. The Protecta-Clear from Everbrite application instructions are quite clear and forceful: polish, neutralize, solvent wipe, and apply coating. The polished column was neutralized with Na2CO3. About 1/4 cup was dissolved in 1.5 cups of water. The column was rinsed and then dried with a clean paper towel. Isopropyl alcohol was used as the solvent wipe. The column was set on aluminum foil. The varnish was painted on with a small natural bristle brush. Using very light strokes any bubbles could be easily removed. The coating is very smooth. Very little running was observed on the vertical column. The second coat was applied after one hour. The column was already dry to the touch. It now needs 4-5 days to fully cure. I will need to set up a cleaning and painting station on the workbench to do all of the various parts. (The brush was cleaned with acetone as mineral spirits did not work.)
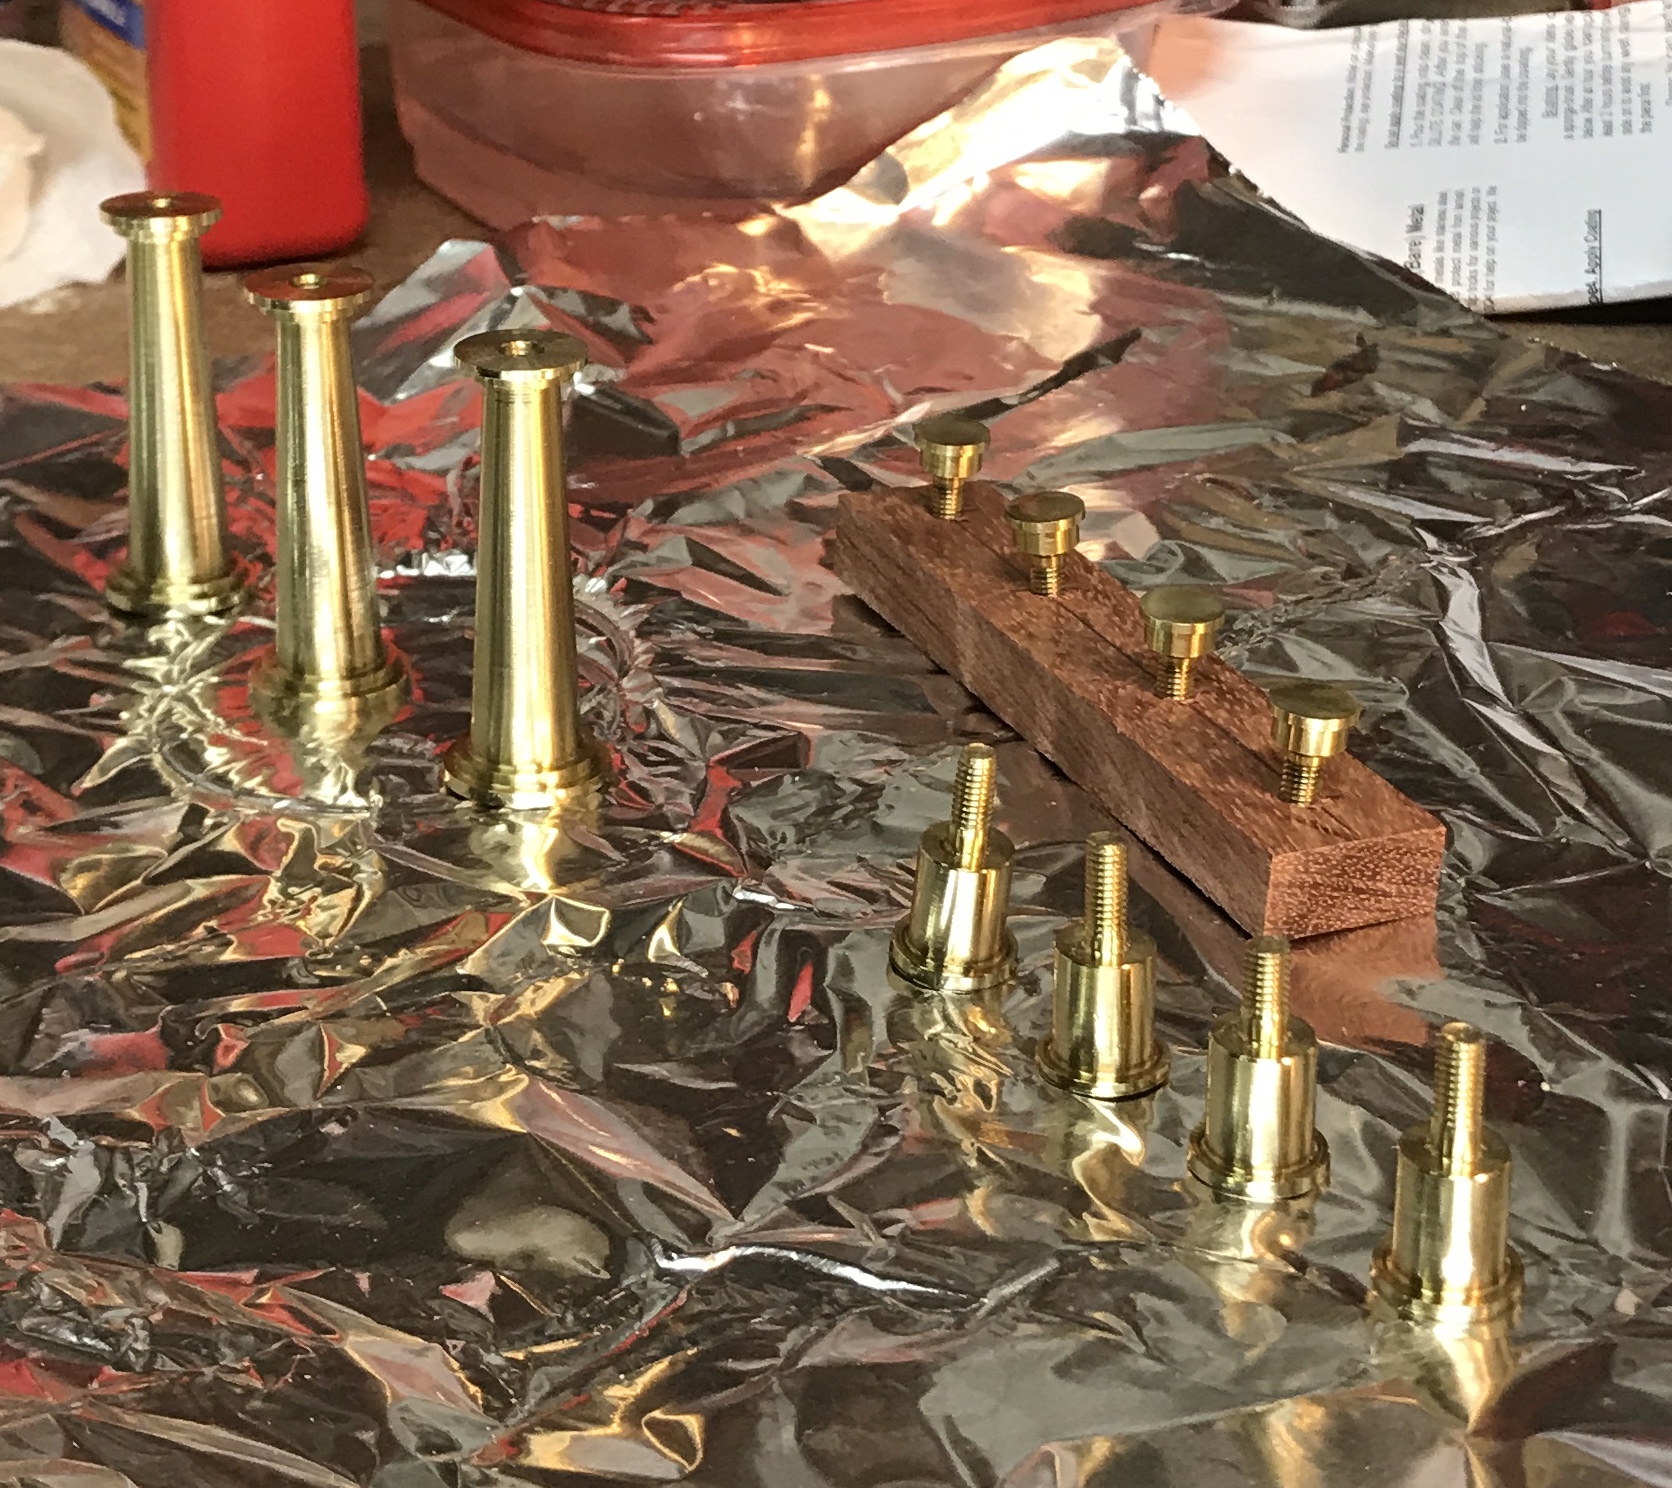
The process was repeated on the other three columns, the four feet, and the four caps. All of these pieces were polished with red rouge on the cloth wheel. They were then thoroughly cleaned with soap and water using a brush as needed to remove the black stuff from the polishing. They were then neutralized with the Na2CO3 solution and rinsed. Finally, isopropanol was used to dry and completely degrease. (I was wearing gloves the entire time.) A jig was made to hold the caps for painting. All of the parts were given two coats of the varnish. The photo below shows these parts immediately after the first coat of varnish was applied.
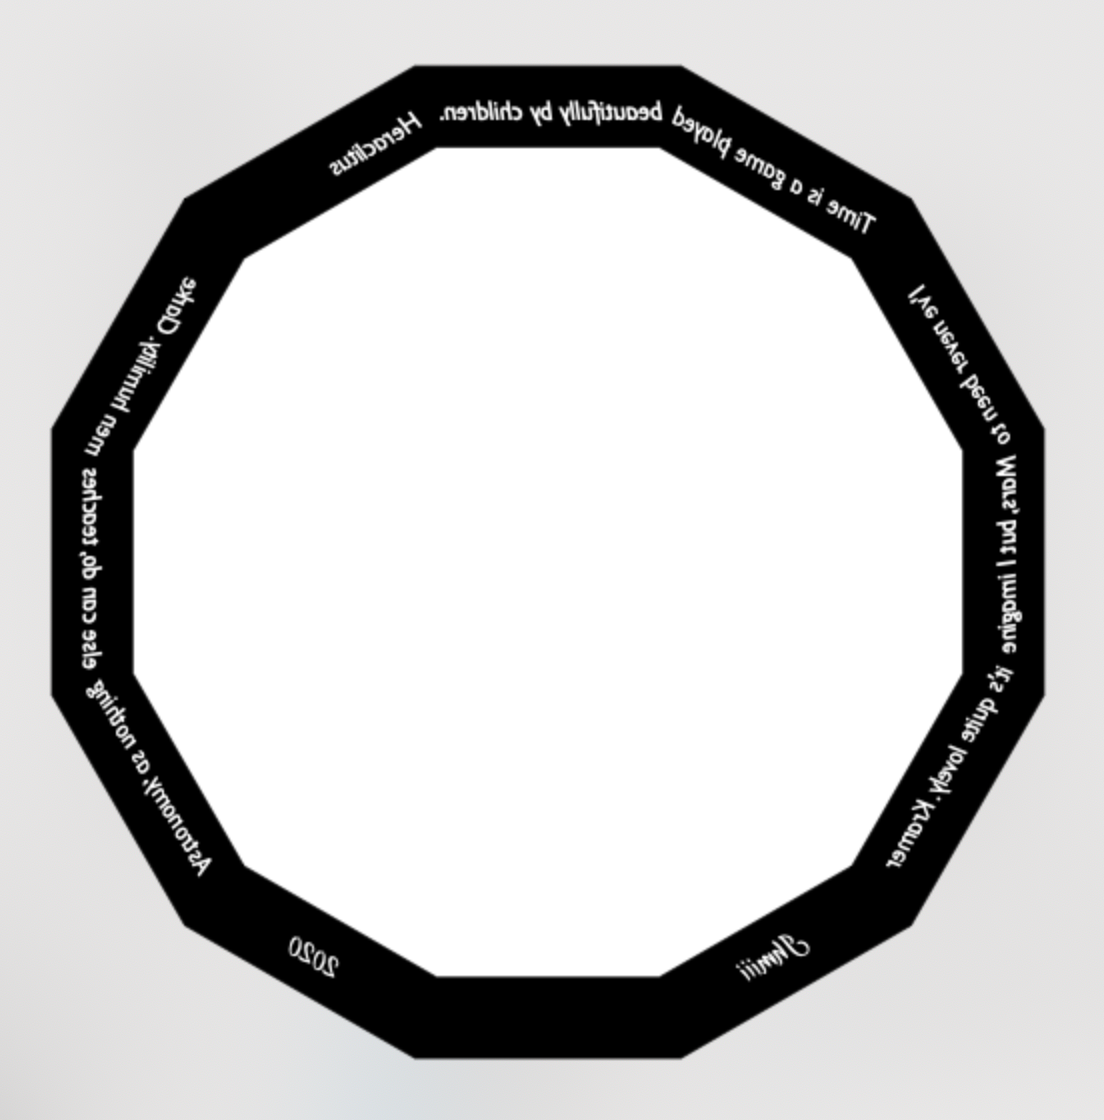
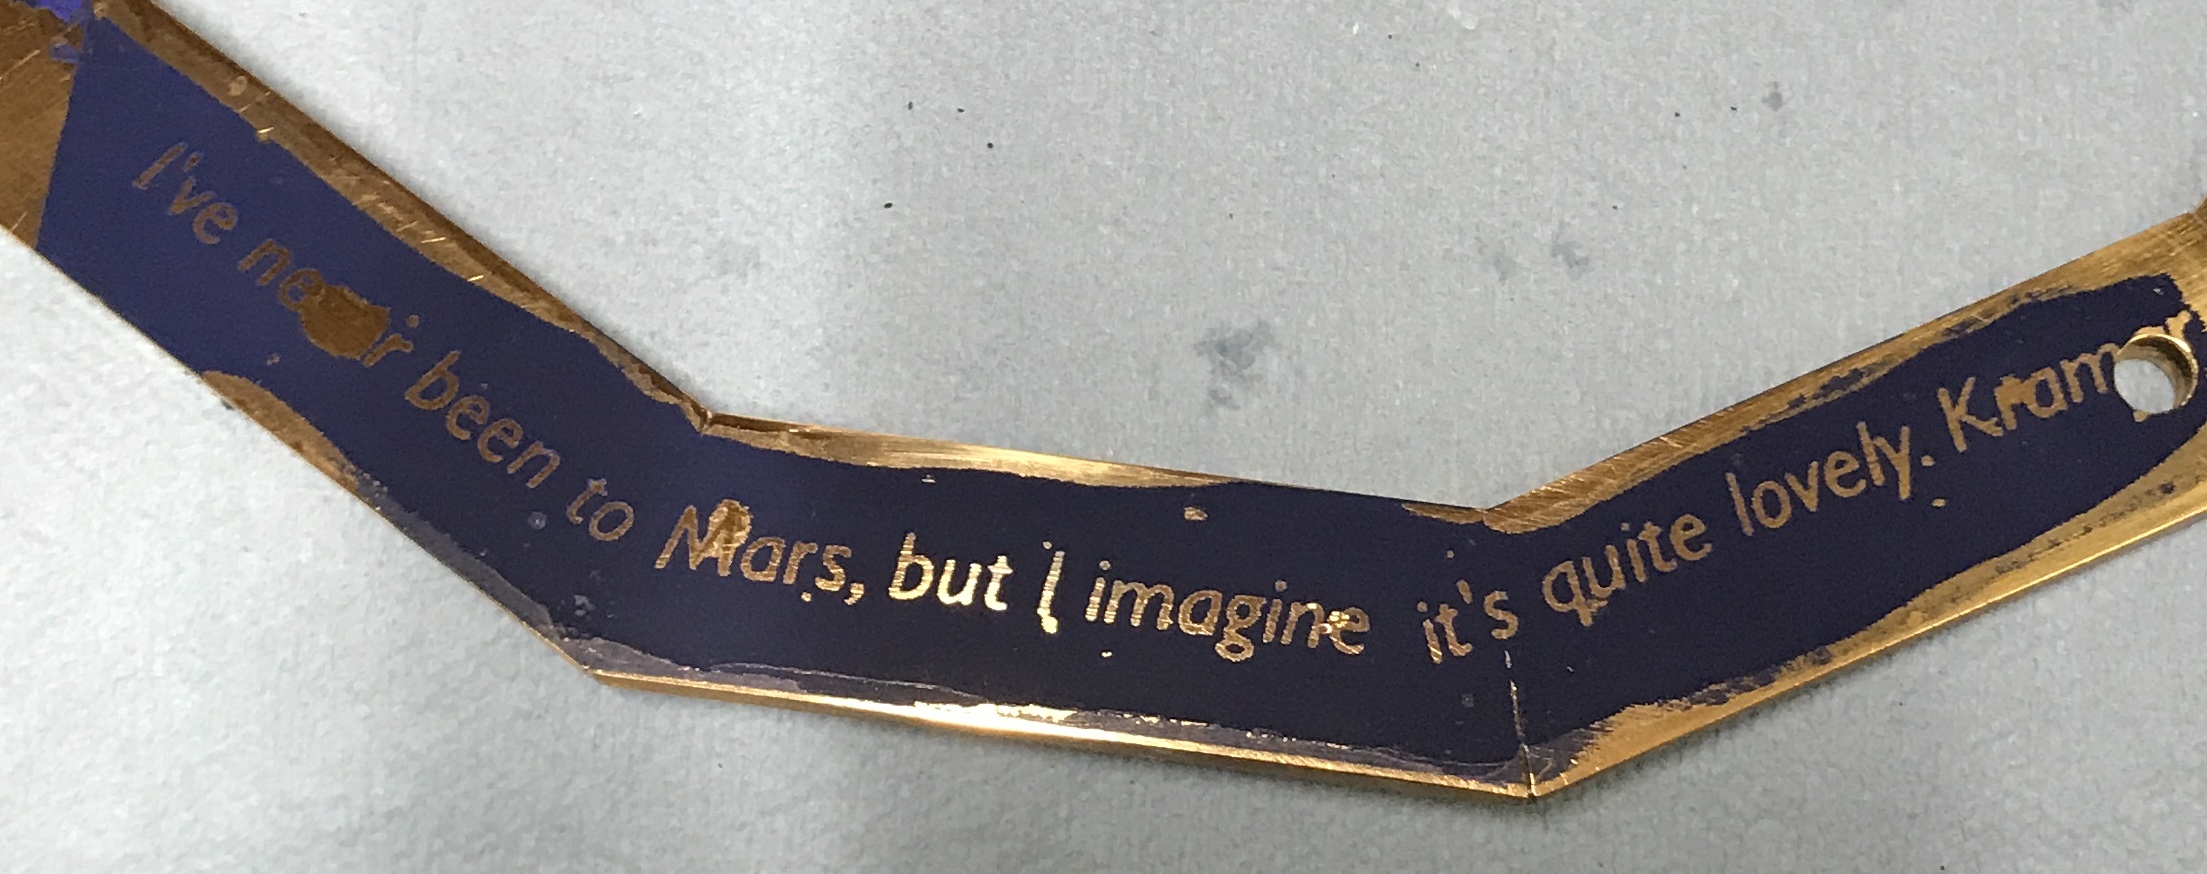
Decided to etch some quotes and a signature/date in the bottom dodecagon. Three quotes were selected: "I've never been to Mars, but I imagine it is quite lovely." Kramer, "Time is a game played beautifully by children." Heraclitus, "Astronomy, as nothing else can do, teaches men humility." Clarke. These three quotes are arranged around the dodecagon. The signature, Jhmiii, and the date, 2020, span the crank side of the dodecagon. This image was created in a file "images/Dodecagon bottom.idraw". It was saved as a printable version in iCloud/Files for etching/ Dodecagon bottom.png. Once I etch this I need to finish before the end of 2020!!
The upper cross brace was selected for finishing next. As it had been previously polished it was sanded with 1500 grit paper to remove tarnish. It was then polished on the brass wheel. It was cleaned, neutralized, and degreased as above. A painting jig was made for it. The four homemade transfer punches used to transfer the column positions from one dodecagon to another were placed in holes drilled in two pieces of wood. This is shown in the photo below after painting the first coat of varnish on the cross brace. Two coats of varnish were applied. This varnish is very nice to work with. It takes a little effort to remove the bubbles with light touches of the brush. It flows well and dries smooth.

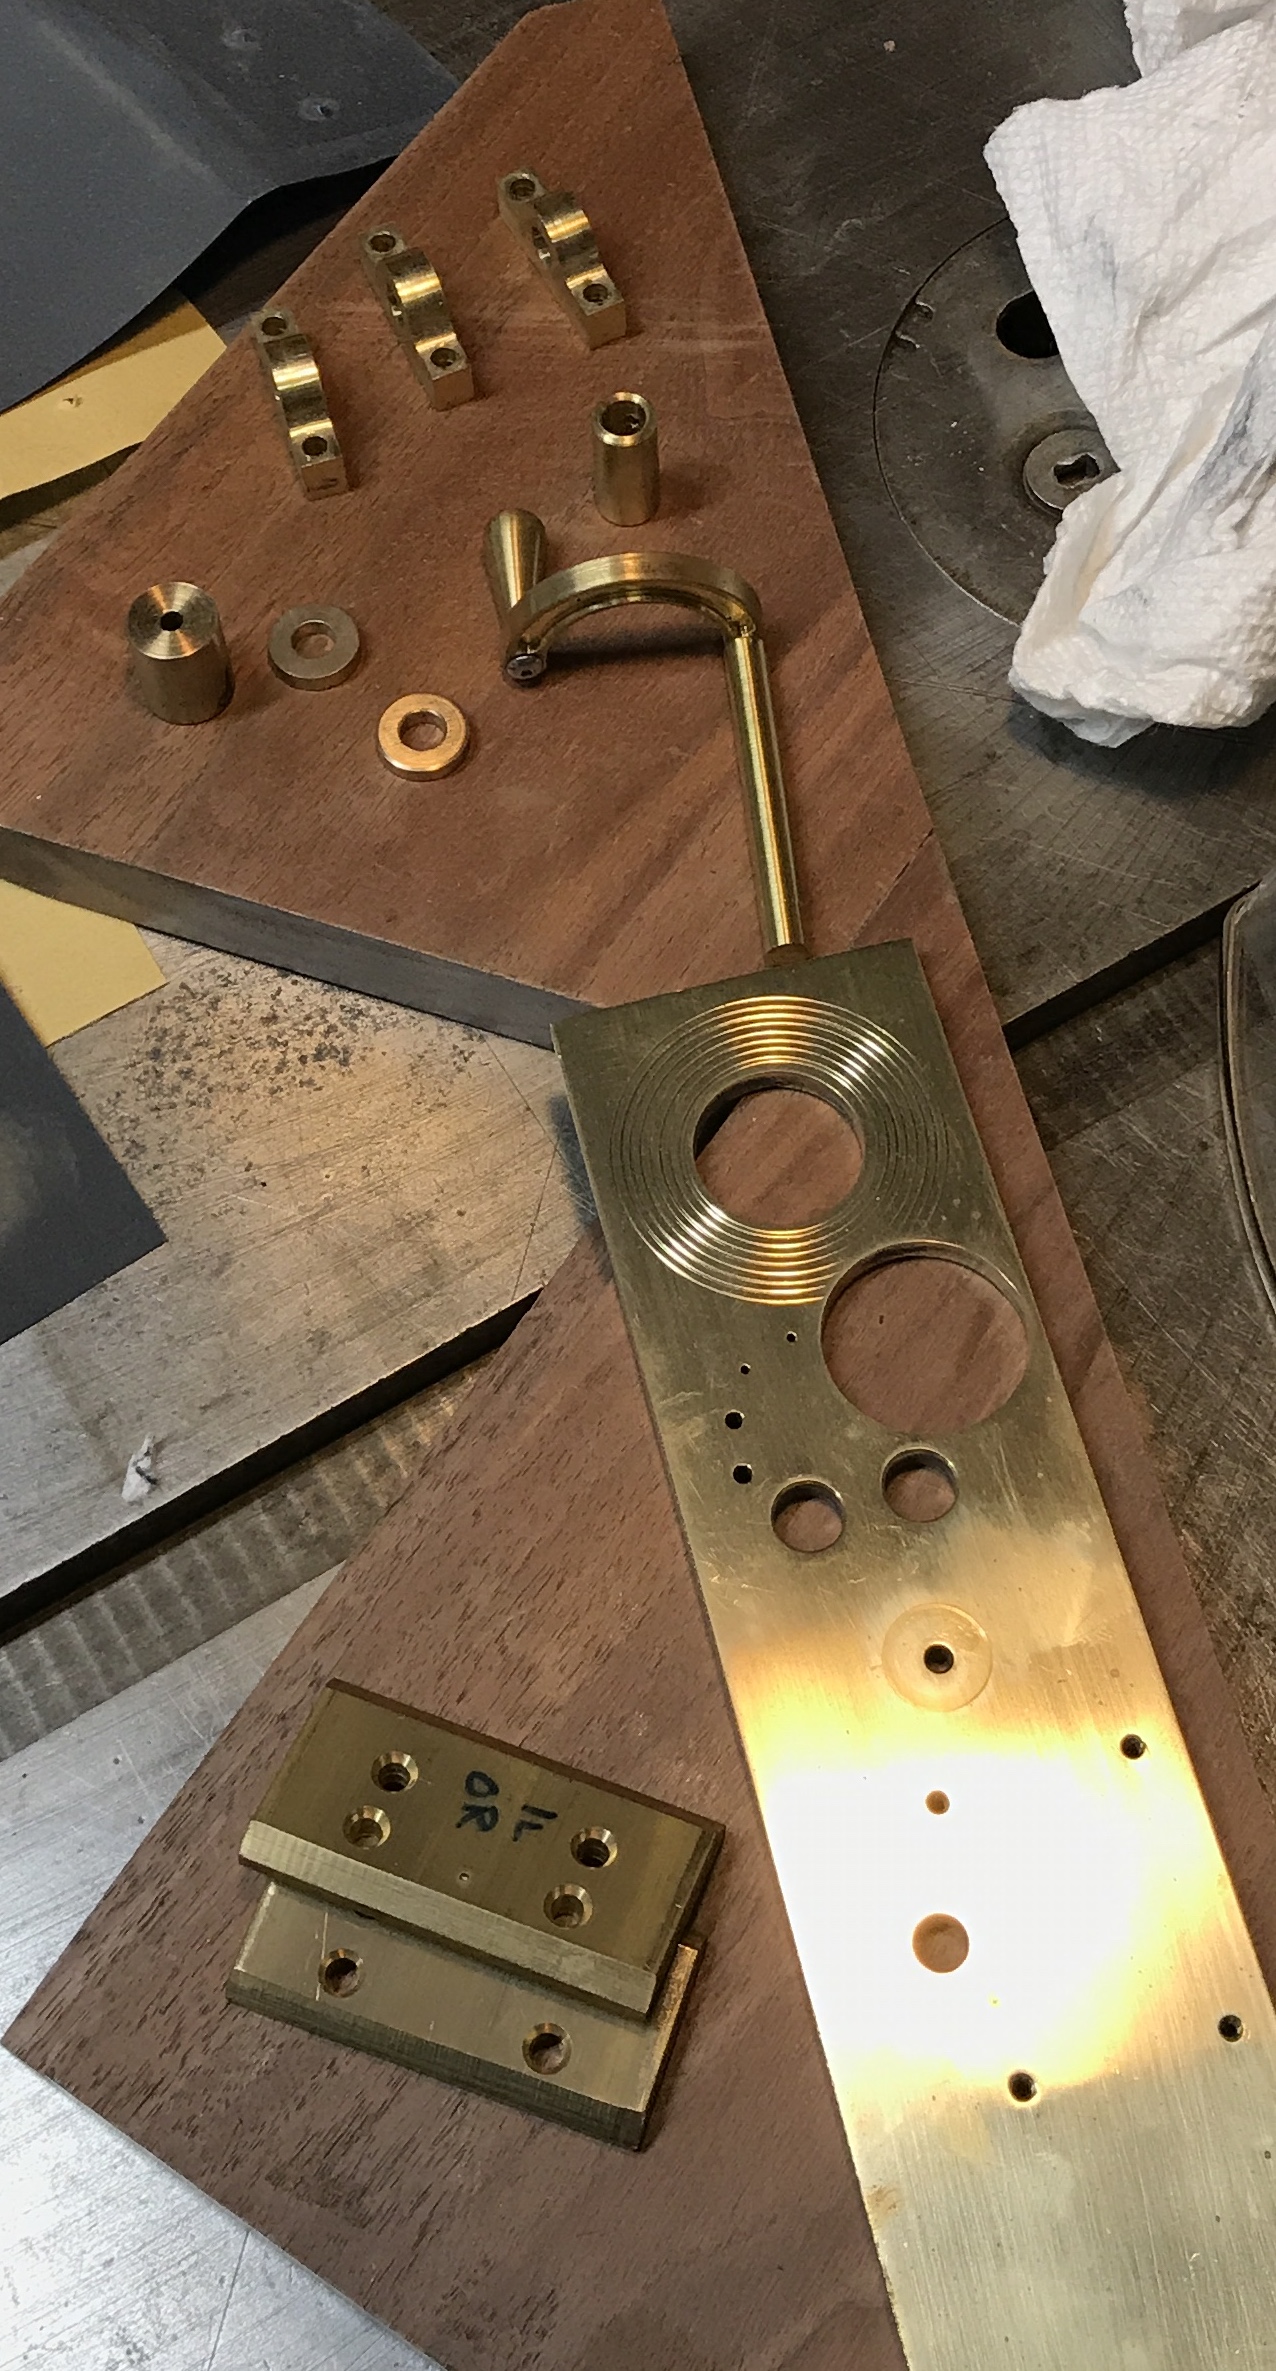
Twelve parts were selected for polishing next. These were the three bearing blocks, the handle and knob, the bottom cross brace, three bearings, the coupling, and the two cross brace supports. They were sanded as needed and then polished. This was followed by the three step cleaning process. A number of jigs were used to hold the parts for painting. The first photo below shows the parts to be polished and the second shows the parts after their first coat of varnish.

The sun was varnished this morning. It was first polished and took on a nice shine even with the "rough" finish. The same cleaning process was used and the first coat of varnish went on smoothly. It is difficult to see the bubbles against the rough background, but I believe I removed most of them. A picture of the sun still wet with the first coat of varnish is included below.
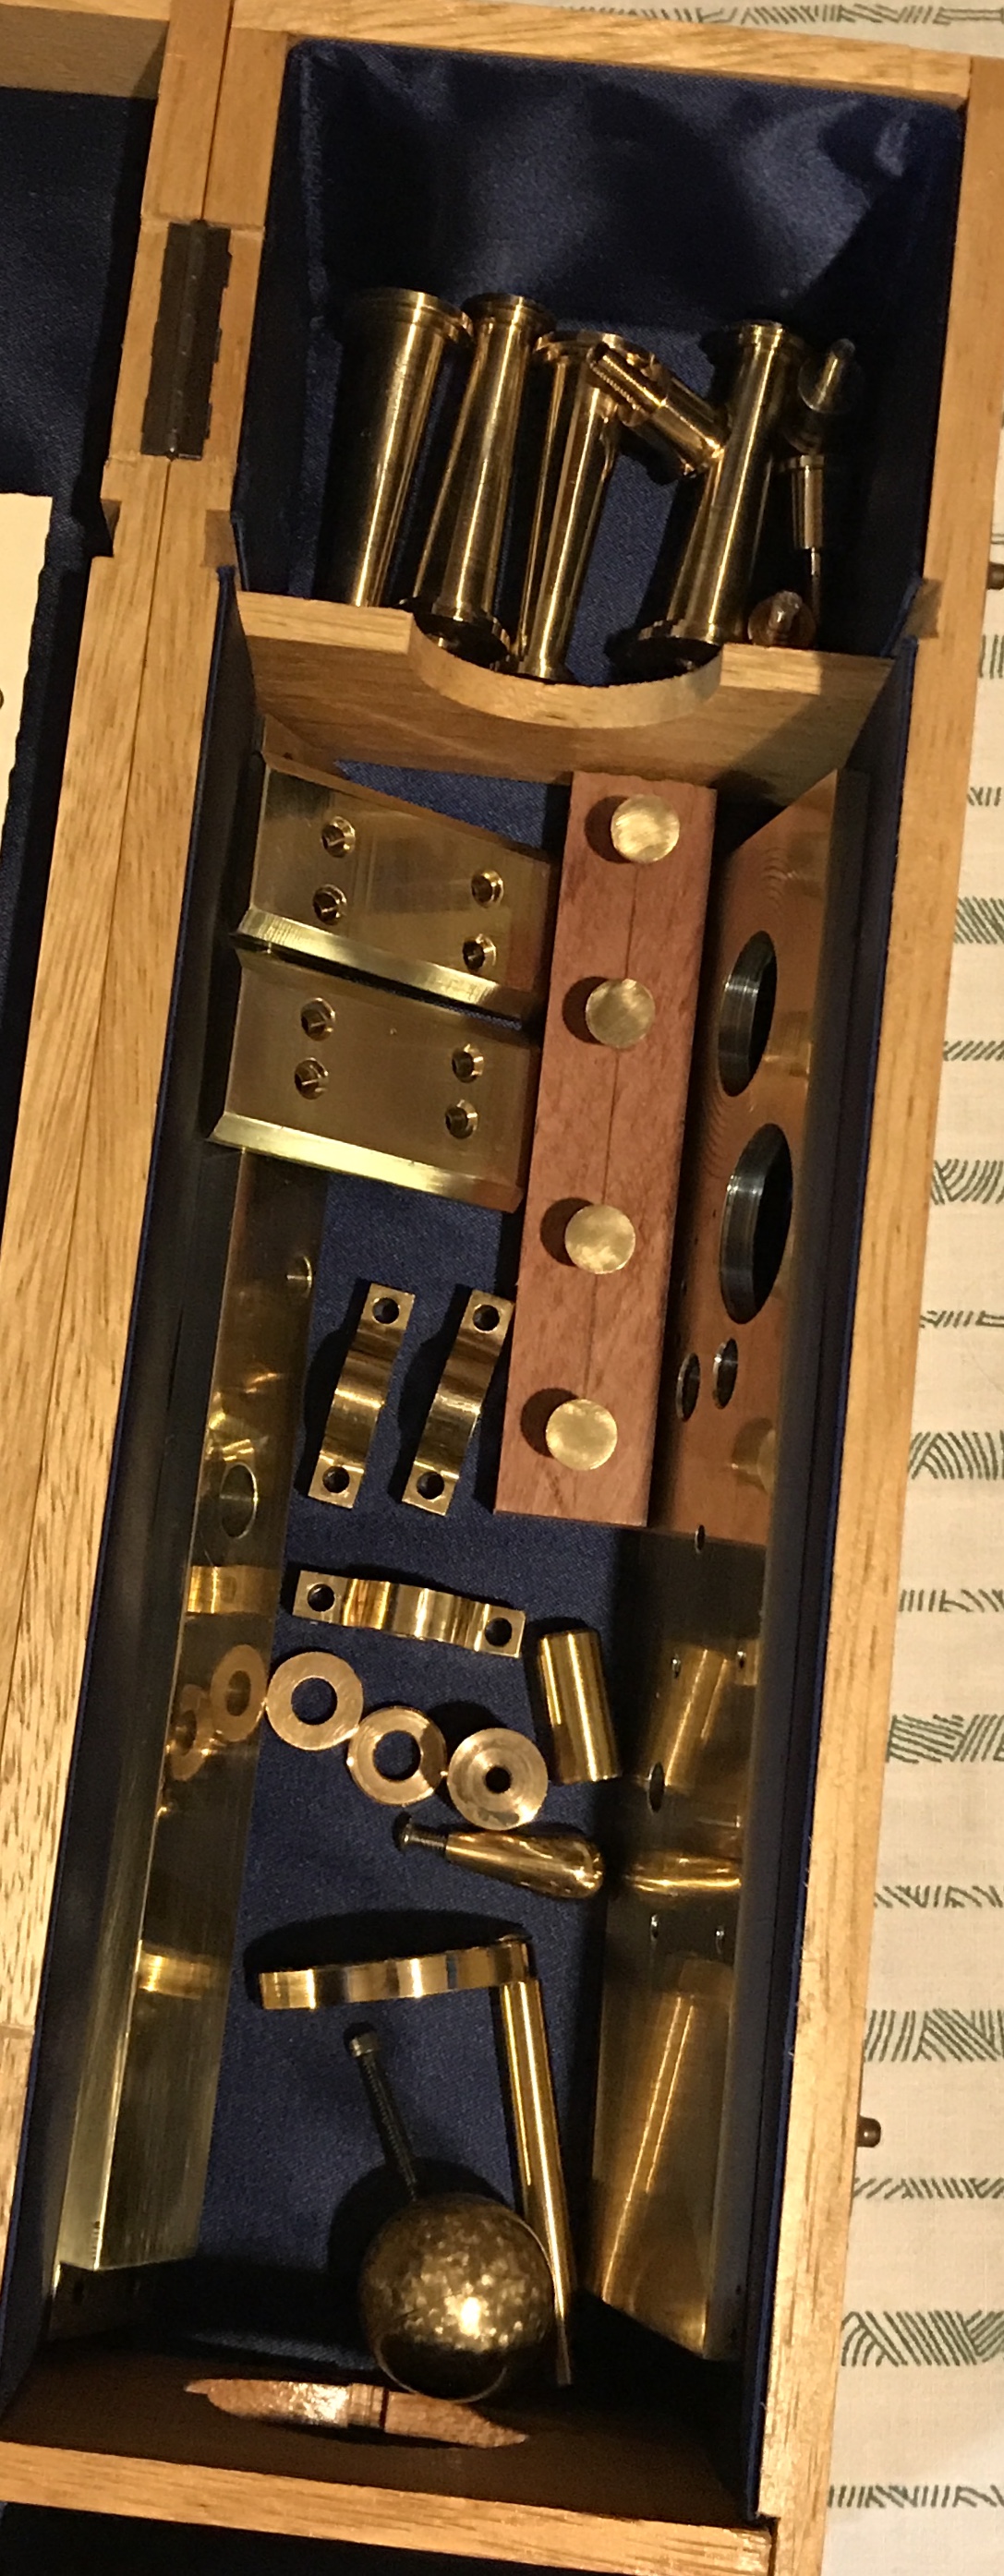
The parts need 4-5 days for the varnish to fully cure. I put them all in an old whiskey box to keep them clean. They will sit there with the box open until I am sure they are all cured. A photo of the polished and varnished parts is shown below.
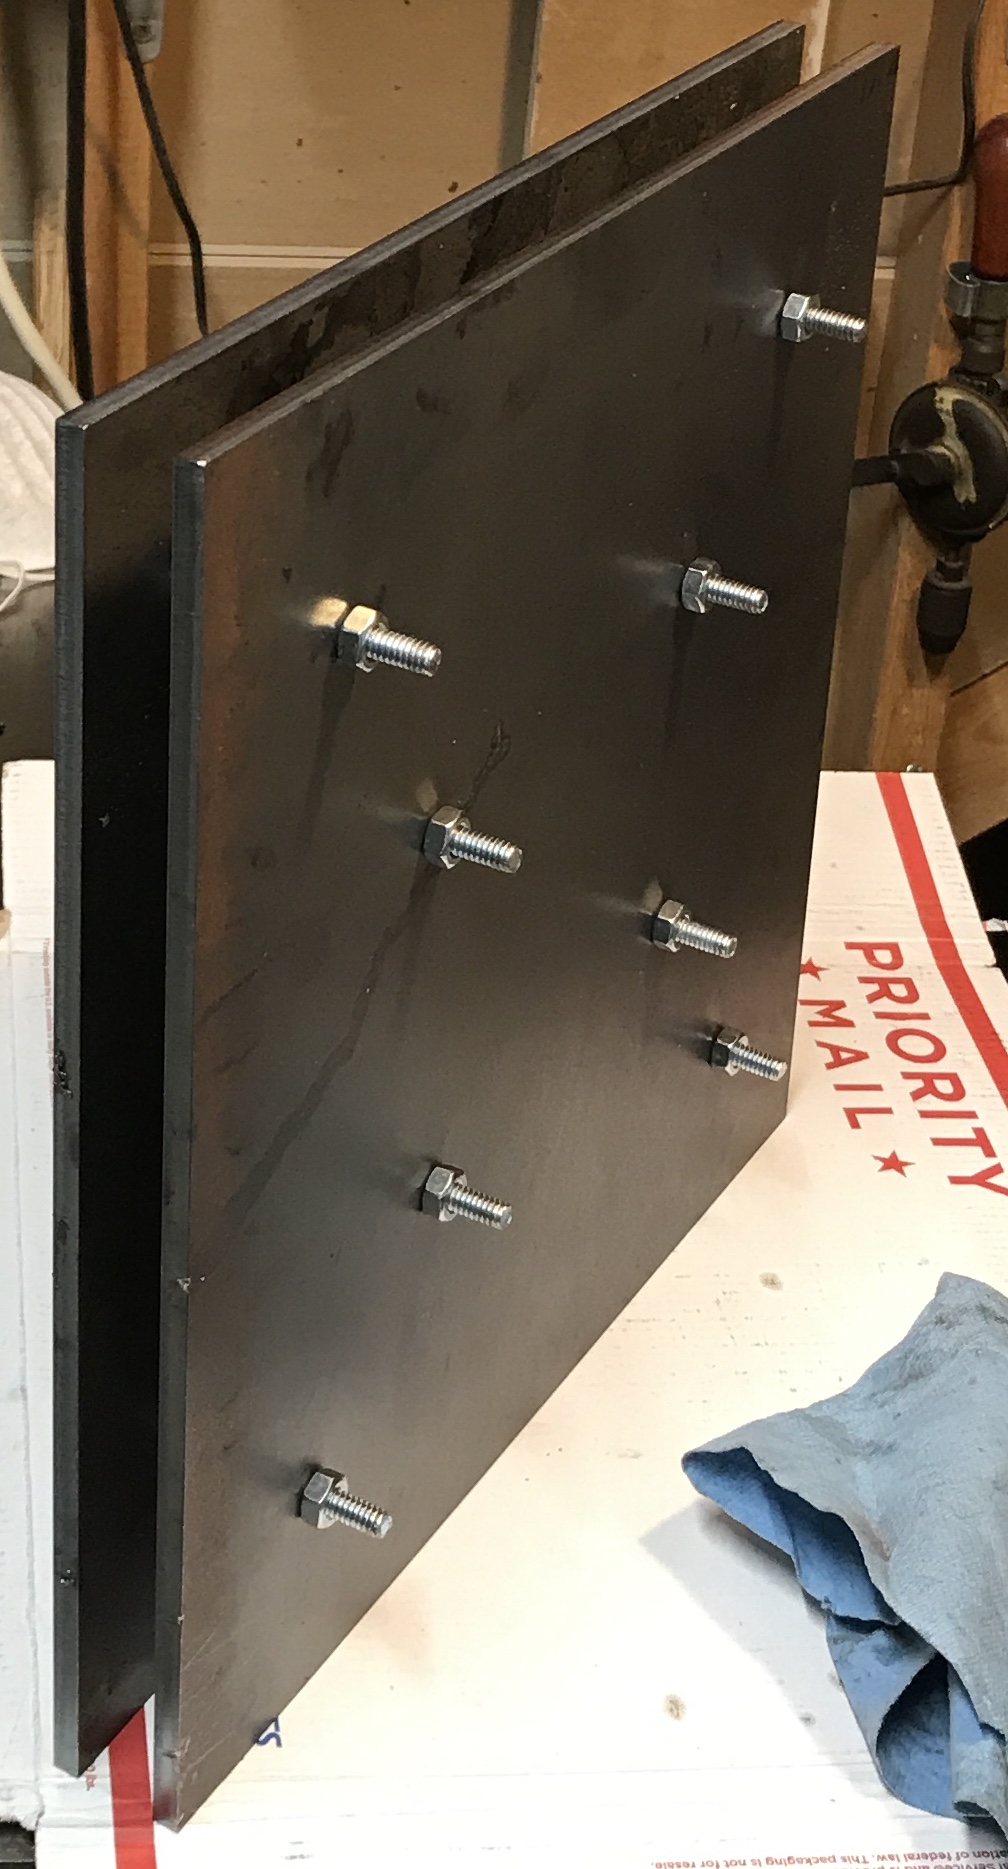
The steel plates for the larger hot press arrived a few days ago. They were clamped together with two machinist's clamps and holes were marked: 2" and 4" in from the corners. The marks were punched and then drilled through with a #7 tap drill. The clamps were removed and the bottom plate was drilled for clearance with a 9/32" drill. The smaller holes were tapped 1/4-20. All holes were lightly chamfered. The pair of plates is very heavy: a great heat reservoir. The hot press is pictured below. (Pair of future pizza stones.)
I have gone back to the printouts and have had problems getting them printing the correct size. I finally found a path forward with pdfs. The pdfs and the pngs of the dodecagon frames would not print out on multiple pages and they are two big at 100% for one page! So I broke the image into pieces These parts are all in the iCloud folder. I then went back to the png for the planet rings. Again the sizes are not correct. I tried Graphic again to remind myself why it did not work forcing me to learn SVG. The problem is that when placing text around a circle it can no longer be flipped to a mirror image. Flipping it only moves it to the other side of the path. In addition flipped text (so its a mirror image) when placed around the circle reverts to regular direction text on the inside of the circle.
I thought of a possible work around. What if I export the text as an image and then bring it back in. Would I be able to flip that image? The program even has a menu item to facilitate this: Edit/Copy As... . One can save a selection to the clipboard as png, pdf, or svg. I tried png but the resolution was poor. However, svg worked well. Once pasted back in the svg image could be flipped to give mirror image text around a circle. An early version with two rings was exported to pdf. This was opened in preview and it printed perfectly!!!
There are now ten files to print: three for the upper dodecagon, four for the lower dodecagon, and one each for the planet rings and the equation of time. Nine of these files are pdfs and one (EOT) is png format. All of these files are in my iCloud folder, "Files for etching". I described this problem to Rhea and she came up with an excellent solution to the size issue. Print them at home where I can control the size and just have them copied onto the acetates at OfficeDepot!!!!! Just returned from making the copies. All went pretty smoothly. Twice acetates stuck together, so only two copies of two designs. Three copies were made of the other seven. They all look a little dusty. I will need to spend some time brushing them off prior to attempting the transfer.
The bottom dodecagon frame was the first transfer attempted. The frame was first sanded with 600 to 1500 grit paper to remove the tarnish. It was then polished with red rouge on the cloth wheel. The frame was washed with soapy water, dried and rinsed with acetone. The four pieces of acetate were cut out, brushed for dust, and taped (masking tape) to the dodecagon. The massive press was taken out to the grill and heated at 300° for 15 minutes. It was removed from the grill with the use of the screws. The top was removed and the dodecagon was placed acetate side down onto the bottom plate. The top plate was replaced and the nuts (not heated) were threaded onto the screws and tightened. The press was returned to the hot grill for two minutes. The press was pulled out of the grill and the nuts were removed. The top was pulled off freeing the frame. After cooling for ten minutes on the aluminum table the tape was removed with the help of a piece of wood. The transfer was quite disappointing. As can be seen in the picture below the transfer was spotty. I am guessing this is due to uneven pressure. The brass and steel are not perfectly flat. Consequently, pressure is applied only in certain areas.
There were multiple challenges using the press besides the poor transfer. Grabbing the two plates by their edges is difficult especially when hot. The press needs a handle. Second, putting on and removing the screws takes about one minute. This is too long. Third, the plates, when separated, get turned and will not go back together until they are rotated to the correct position. The insides also need to be matched. Some marks on the plates need to be added to facilitate reassembly. Finally, when the top plate was removed after heating, the dodecagon frame was stuck to the top plate. The glue from the tape must have leaked out. This only becomes an issue, if there is nothing available to pry the frame loose.
I assumed the tape was sufficient to make up for any gaps between the frame and the steel. Clearly this is not the case. I am not quite sure what to use to more evenly distribute the pressure around the dodecagon. I did not completely tighten the center four screws before putting the dodecagon back into the grill. I was trying to minimize time off of the grill. This may have also contributed to the uneven pressure. Some hard foam would be ideal to place behind the frame. I do not know what kinds of foam will hold up to 300°.
A second transfer attempt was made today. The same strips of acetate used in the first transfer attempt were reused. They were taped on as before. The differences this time were the press was heated for 30 minutes. The screws were tightened as far as they would go. The press with brass was left in the oven for five minutes. The tape was then removed after cooling the brass. There was significantly more ink transfer. But, there were still spots that had little transfer. I think this means that sufficient pressure can be applied with the screws. The pressure, however, is not applied evenly across the brass even though it was aligned pretty evenly with the screws. I don't think I need a lot of packing to transfer the pressure evenly. Possibly a piece of poster board or similar might do the trick.
The thickness of the brass dodecagon was measured at three sites per side. This data is plotted in the following graph. It is difficult to understand how a 1-3 thou would make such a difference. The steel sheets are very flat unlike the hot rolled steel used for the small press. A thin sheet of cardboard should fill those small gaps and hopefully lead to full ink transfer. Time to test the hypothesis.
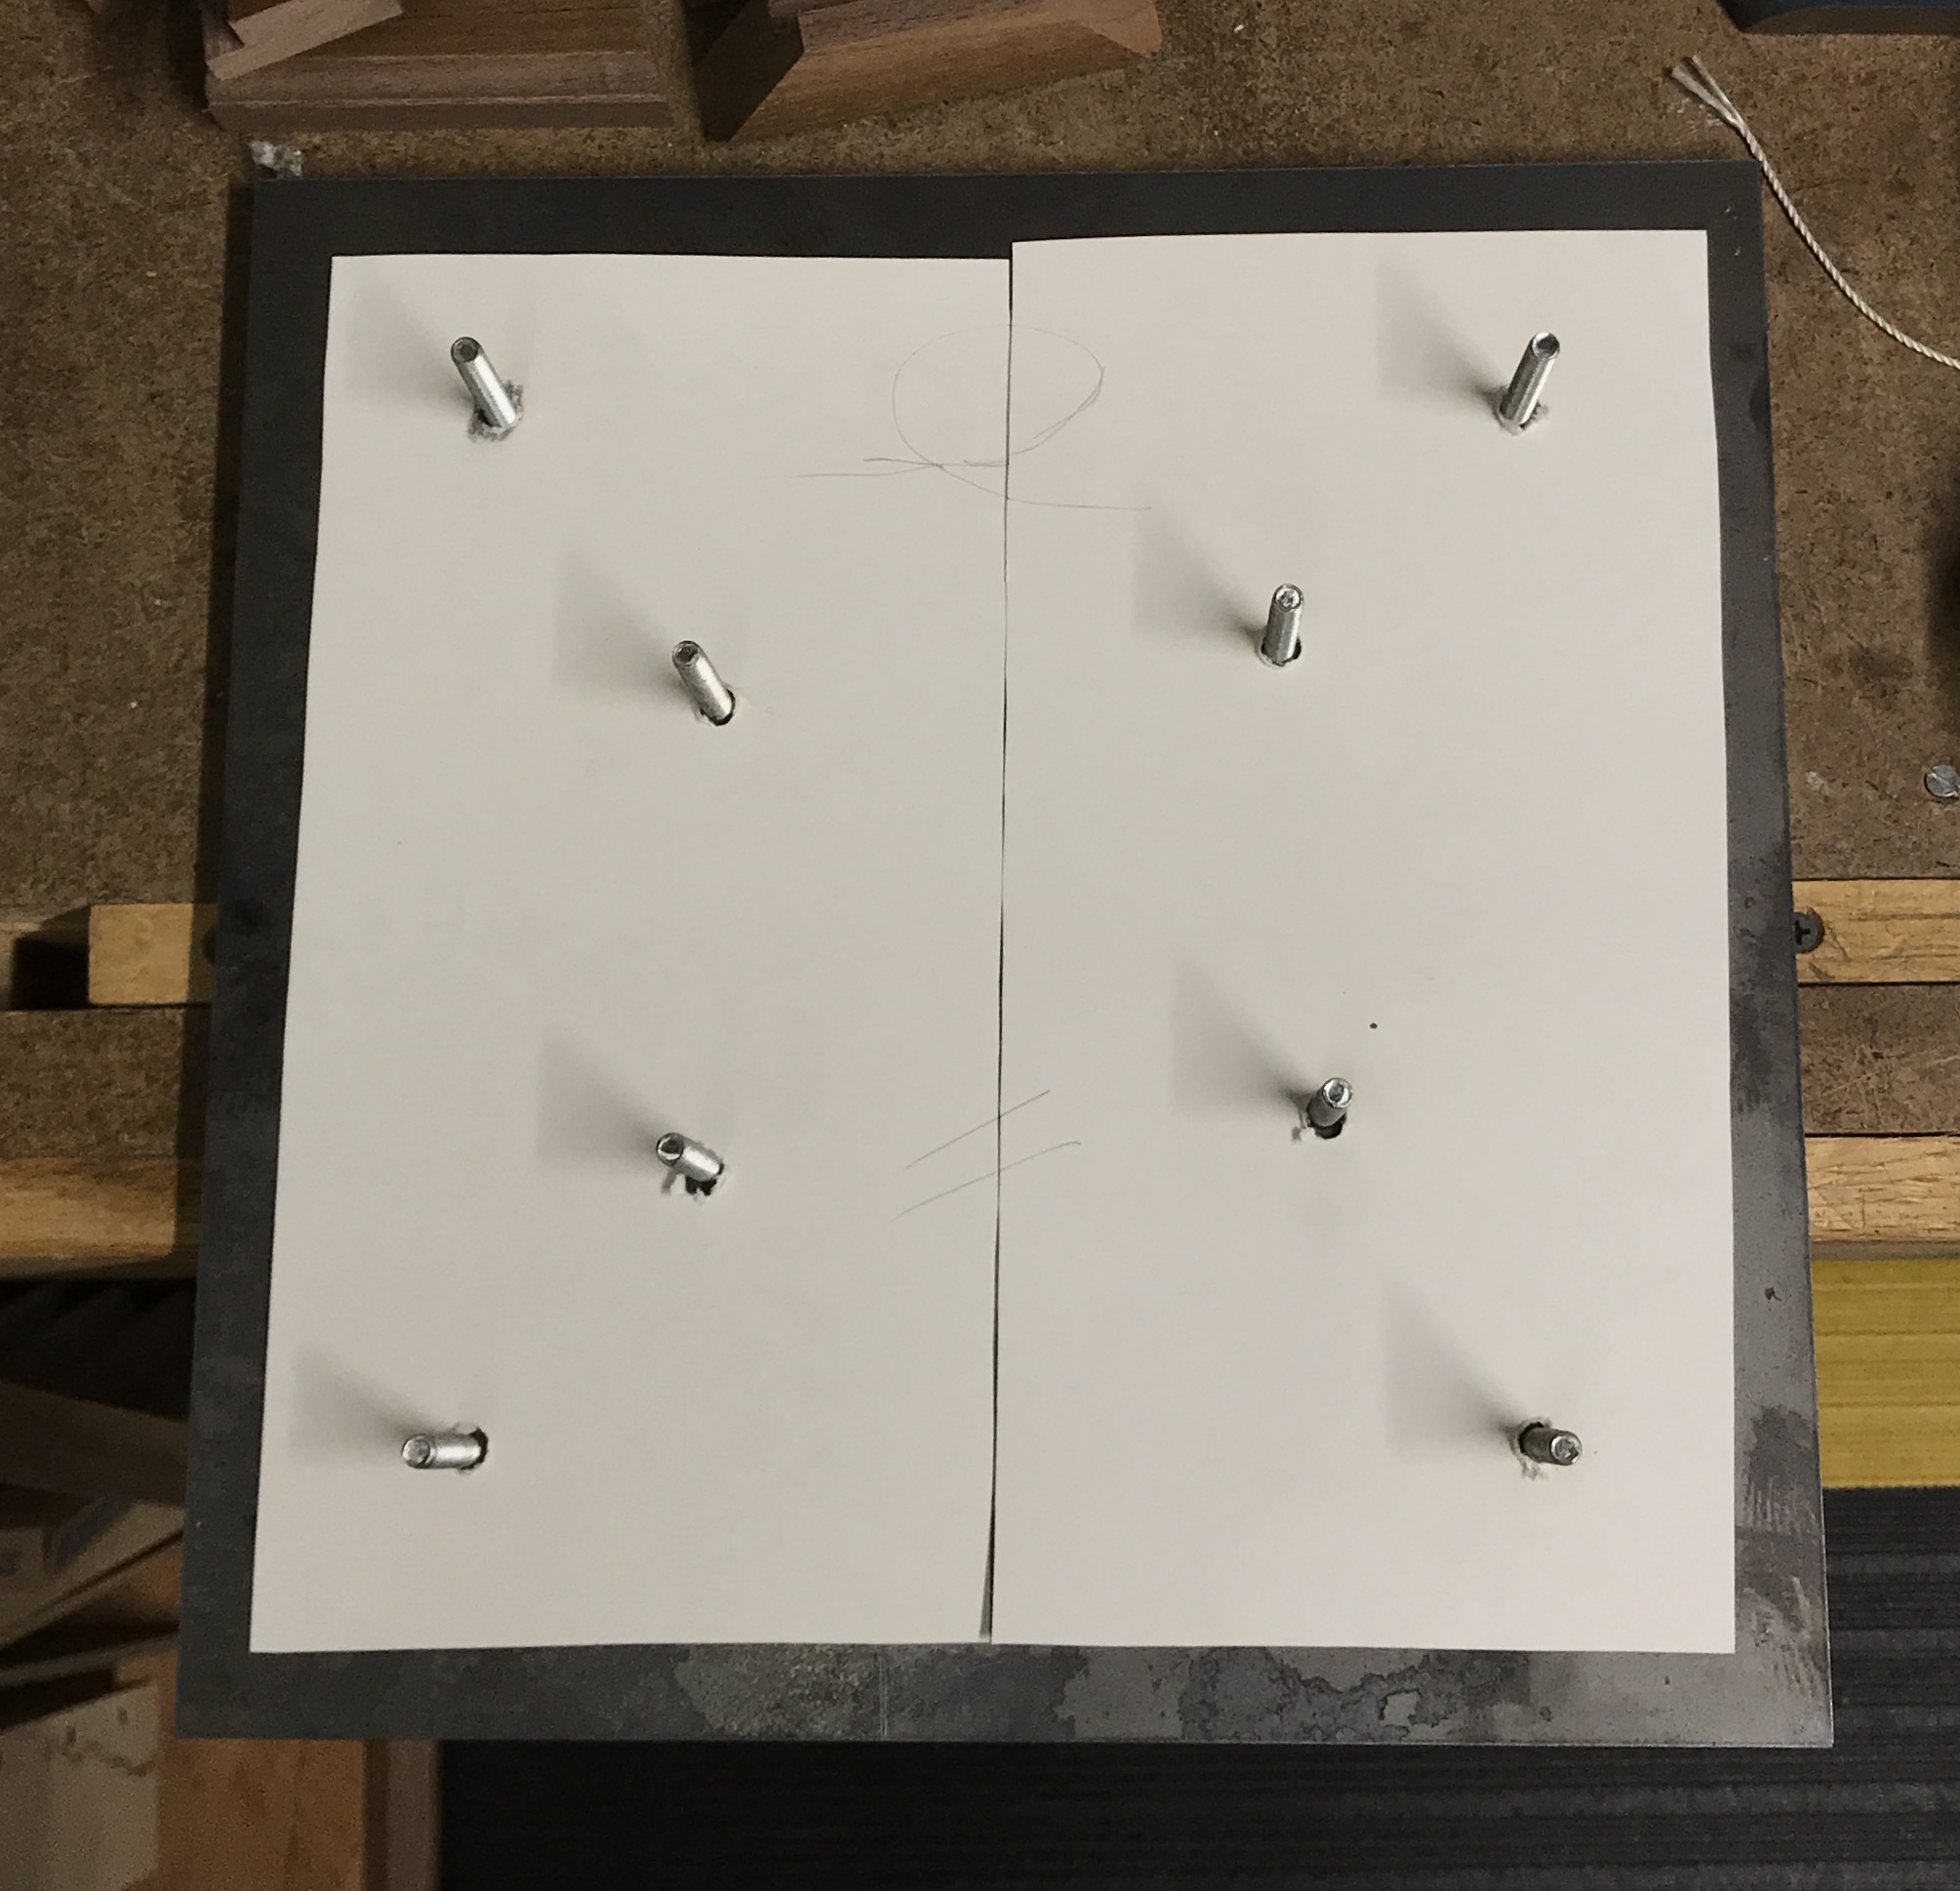
Two sheets of thin cardboard were used to make the spacer. They were each cut to fit half of the press. They were clamped to the top of the press and the holes were marked with a punch. The sheets were also marked for correct orientation relative to each other and to the press. The holes were then drilled 5/16", clearance. The sheets fit nicely over the screws in the bottom plate with minimal gap between them. The picture below shows the sheets in place on the screws.
A third transfer attempt was undertaken this morning. Various pieces for printout were used for this trial. Some were parts of planet rings from a previous printing. Just two pieces of tape were used for each section to minimize different thicknesses across the section. The press was heated to 300° for 30 minutes. The dodecagon was put in place and the cardboard was placed on top of the dodecagon. The top was put in place and screwed tightly to the bottom. The press was then put back into the grill for four minutes. The press was removed. The nuts were removed and the top was lifted off. The cardboard was pulled off and the dodecagon was pried loose from the bottom. It was left to cool for ten minutes. The tape was removed. All but one of the sections had complete transfer, i.e., the acetate had no remaining ink. There was, however, a lot of ink flow. This can be seen in the photo below. The three sections that used a previous printout of the planet rings flowed the most. There were no visible letters on those sections. With the assembly and tightening, the ink was heated for 7-9 minutes.
There was only one layer of tape used in this trial, where there have been two. That could be responsible for the flow. The thinner tape may have also helped give a complete transfer. The only places that did not transfer were the ends of the sections where there was no tape. So the cardboard did not make up for the thickness of the tape. The assembly and nut tightening process can probably not be completed any faster. The whole assembly could be left on the grill for a shorter time. The transfer worked very well on a small scale. The factor responsible for failure upon scale-up is not clear. It is probably lack of control of the heating/pressing time. A smaller press could be used and the dodecagon could be done section by section. It is less clear how the planet rings would be done in a small press.
Another transfer attempt failed. Repeated the process above but deliberately tried to minimize the setup time. After heating the press it was removed and the brass dodecagon was put in place. The top was put on and the screws tightened. It was returned to the grill for one minute. It was then removed from the grill, unscrewed, and the brass was set on the aluminum table to cool. The total time from taking the press out of the grill after pre-warming to setting the dodecagon on the table was eight minutes. After cooling to just warm the tape was removed and the transfer inspected. The transfer was not complete, maybe 90%. Nearly all of the transferred ink had run. Only one or two of the letters were not fuzzy. So much for using this large press to transfer ink to the dodecagons.
I will attempt a transfer to the Mars planet ring. The thinner metal may make a difference. I won't use the screws, but just stand on the press for one or two minutes. The Mars planet ring would be difficult to do in pieces, that is why it has been chosen. The ring was sanded with 1000 and 1500 grit sandpaper. It was then polished with red rouge. It was cleaned with soap and water followed by an acetone wipe. A printed Mars circle was cut out of the acetate and taped to the ring. There are a number of bubbles that, with luck, will be pressed flat by the hot press. The spots where the bubbles are were marked to see if they correspond to any differences in transferring. The bubbles are due to cutting the acetate ring just a tad larger than the brass ring. The tape pushes the extra acetate in creating a bubble.
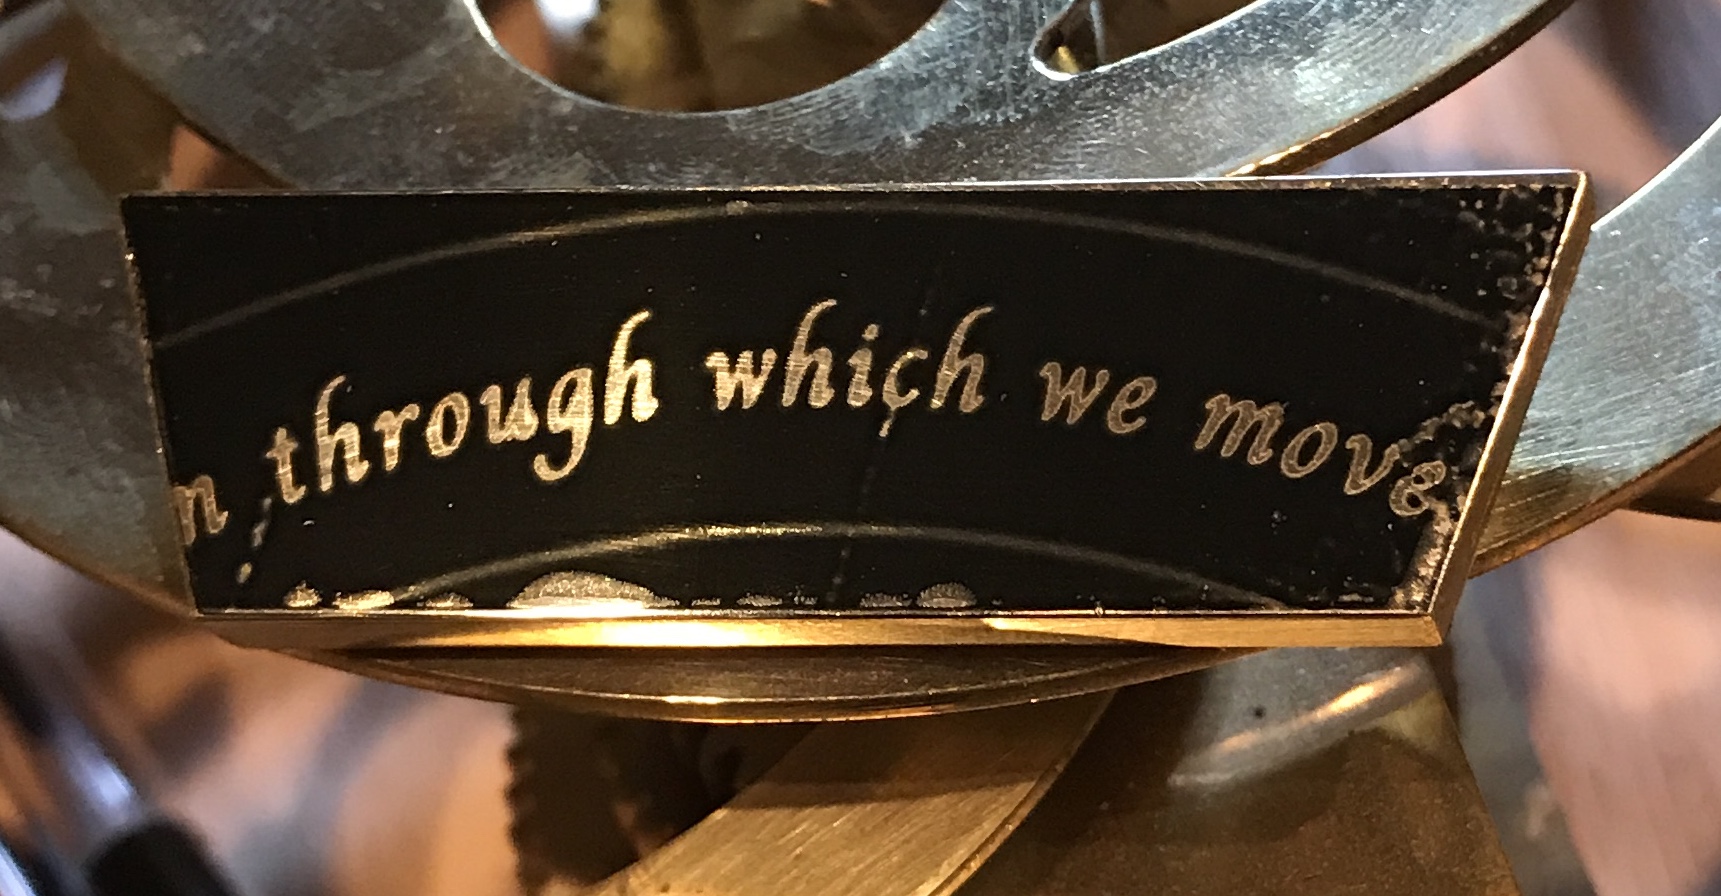
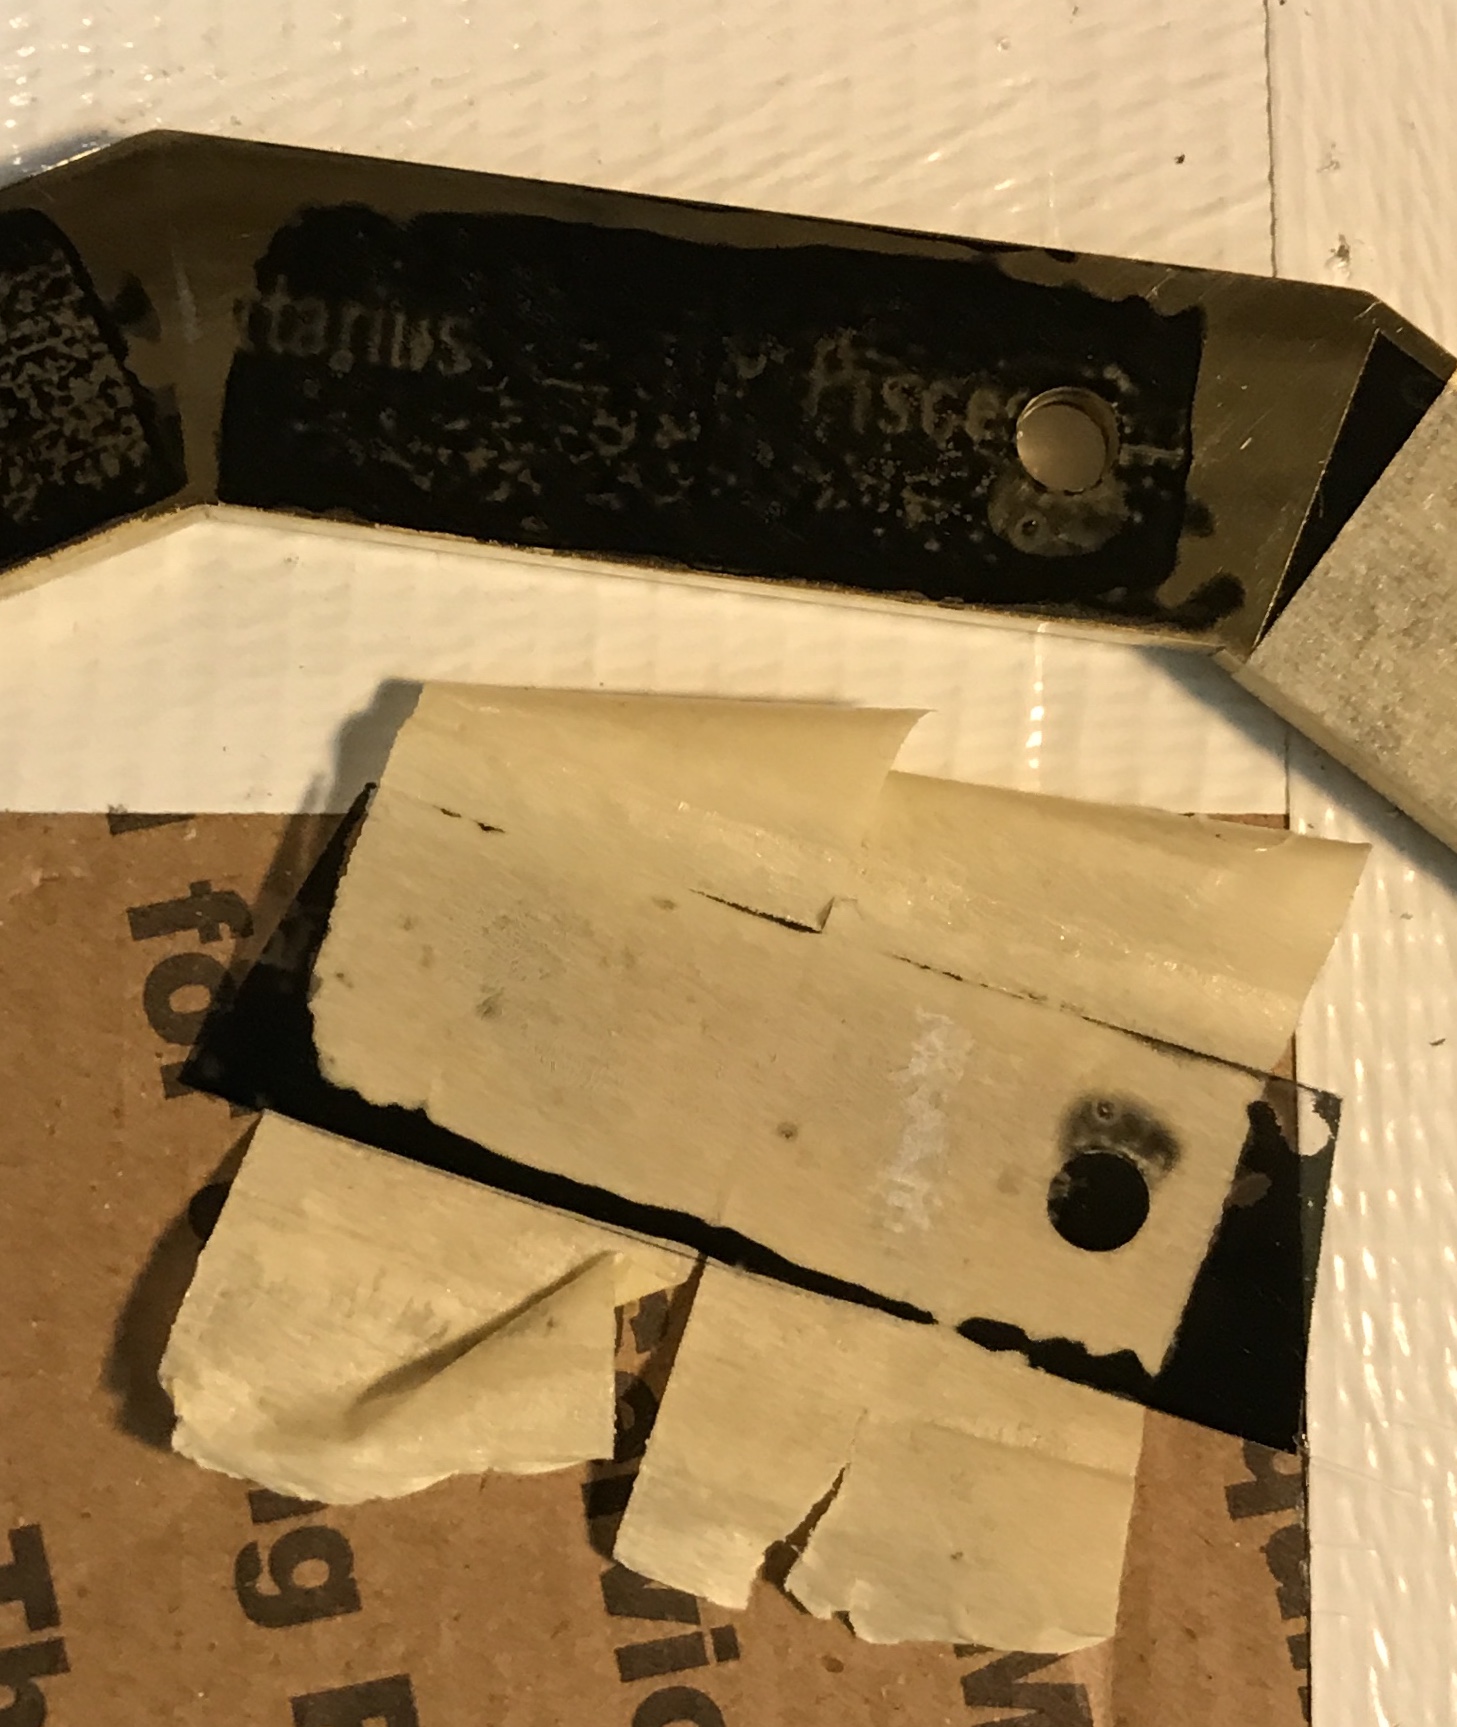
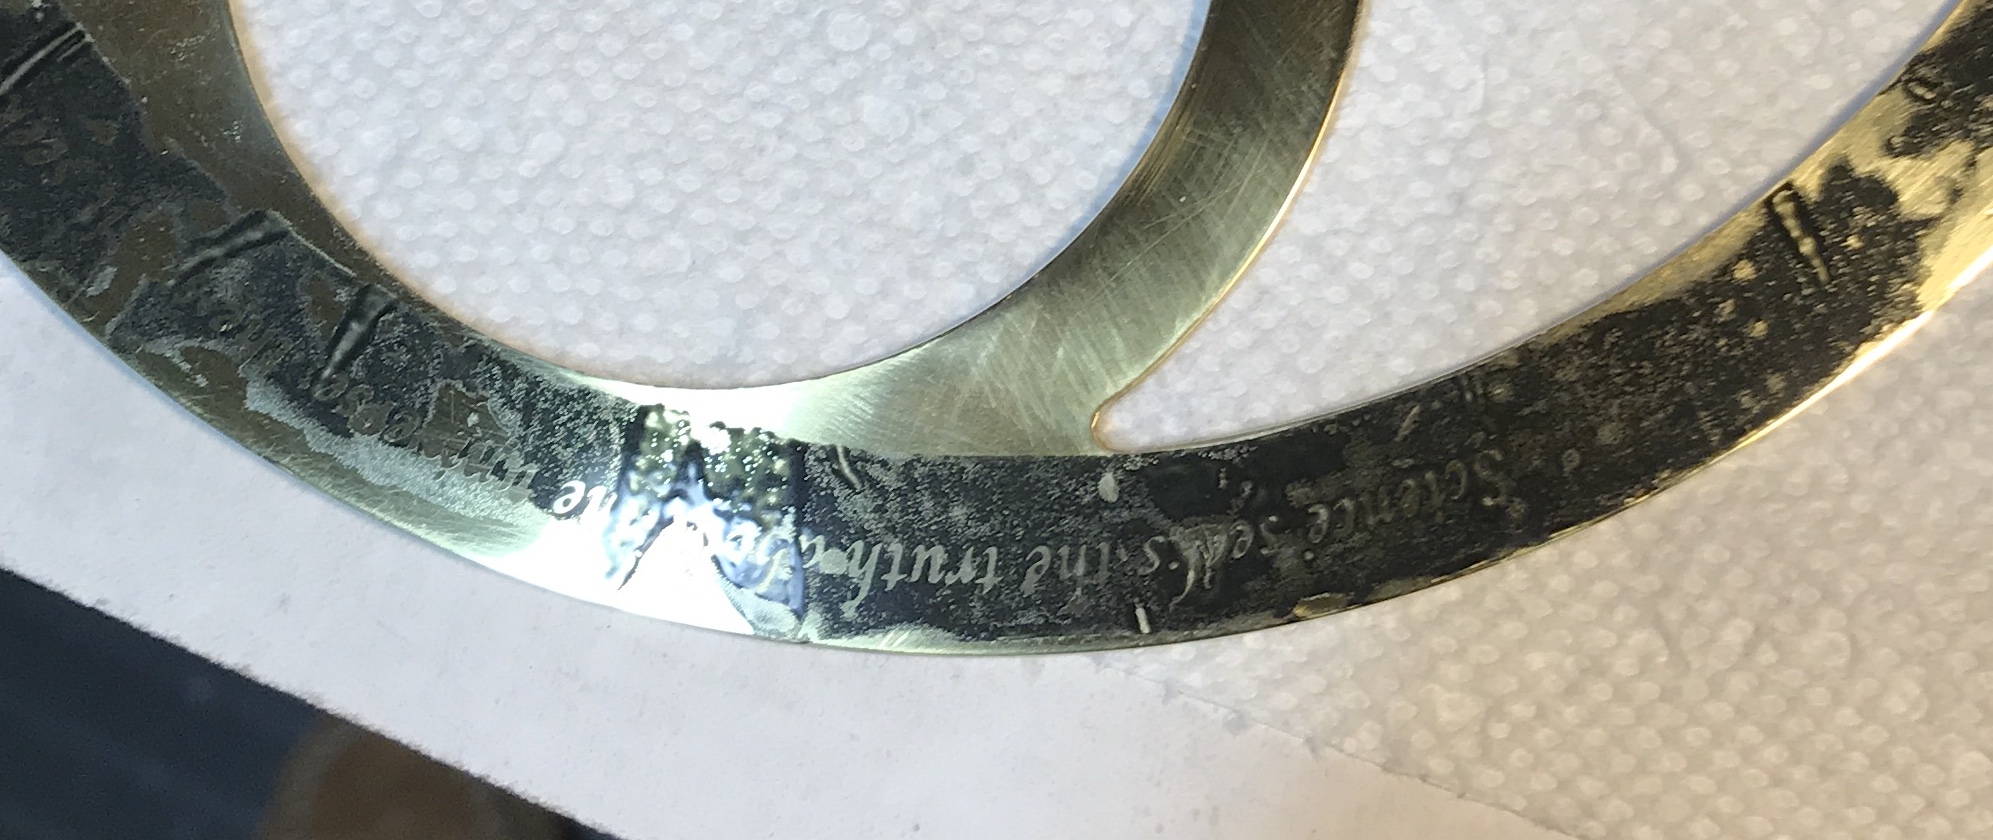
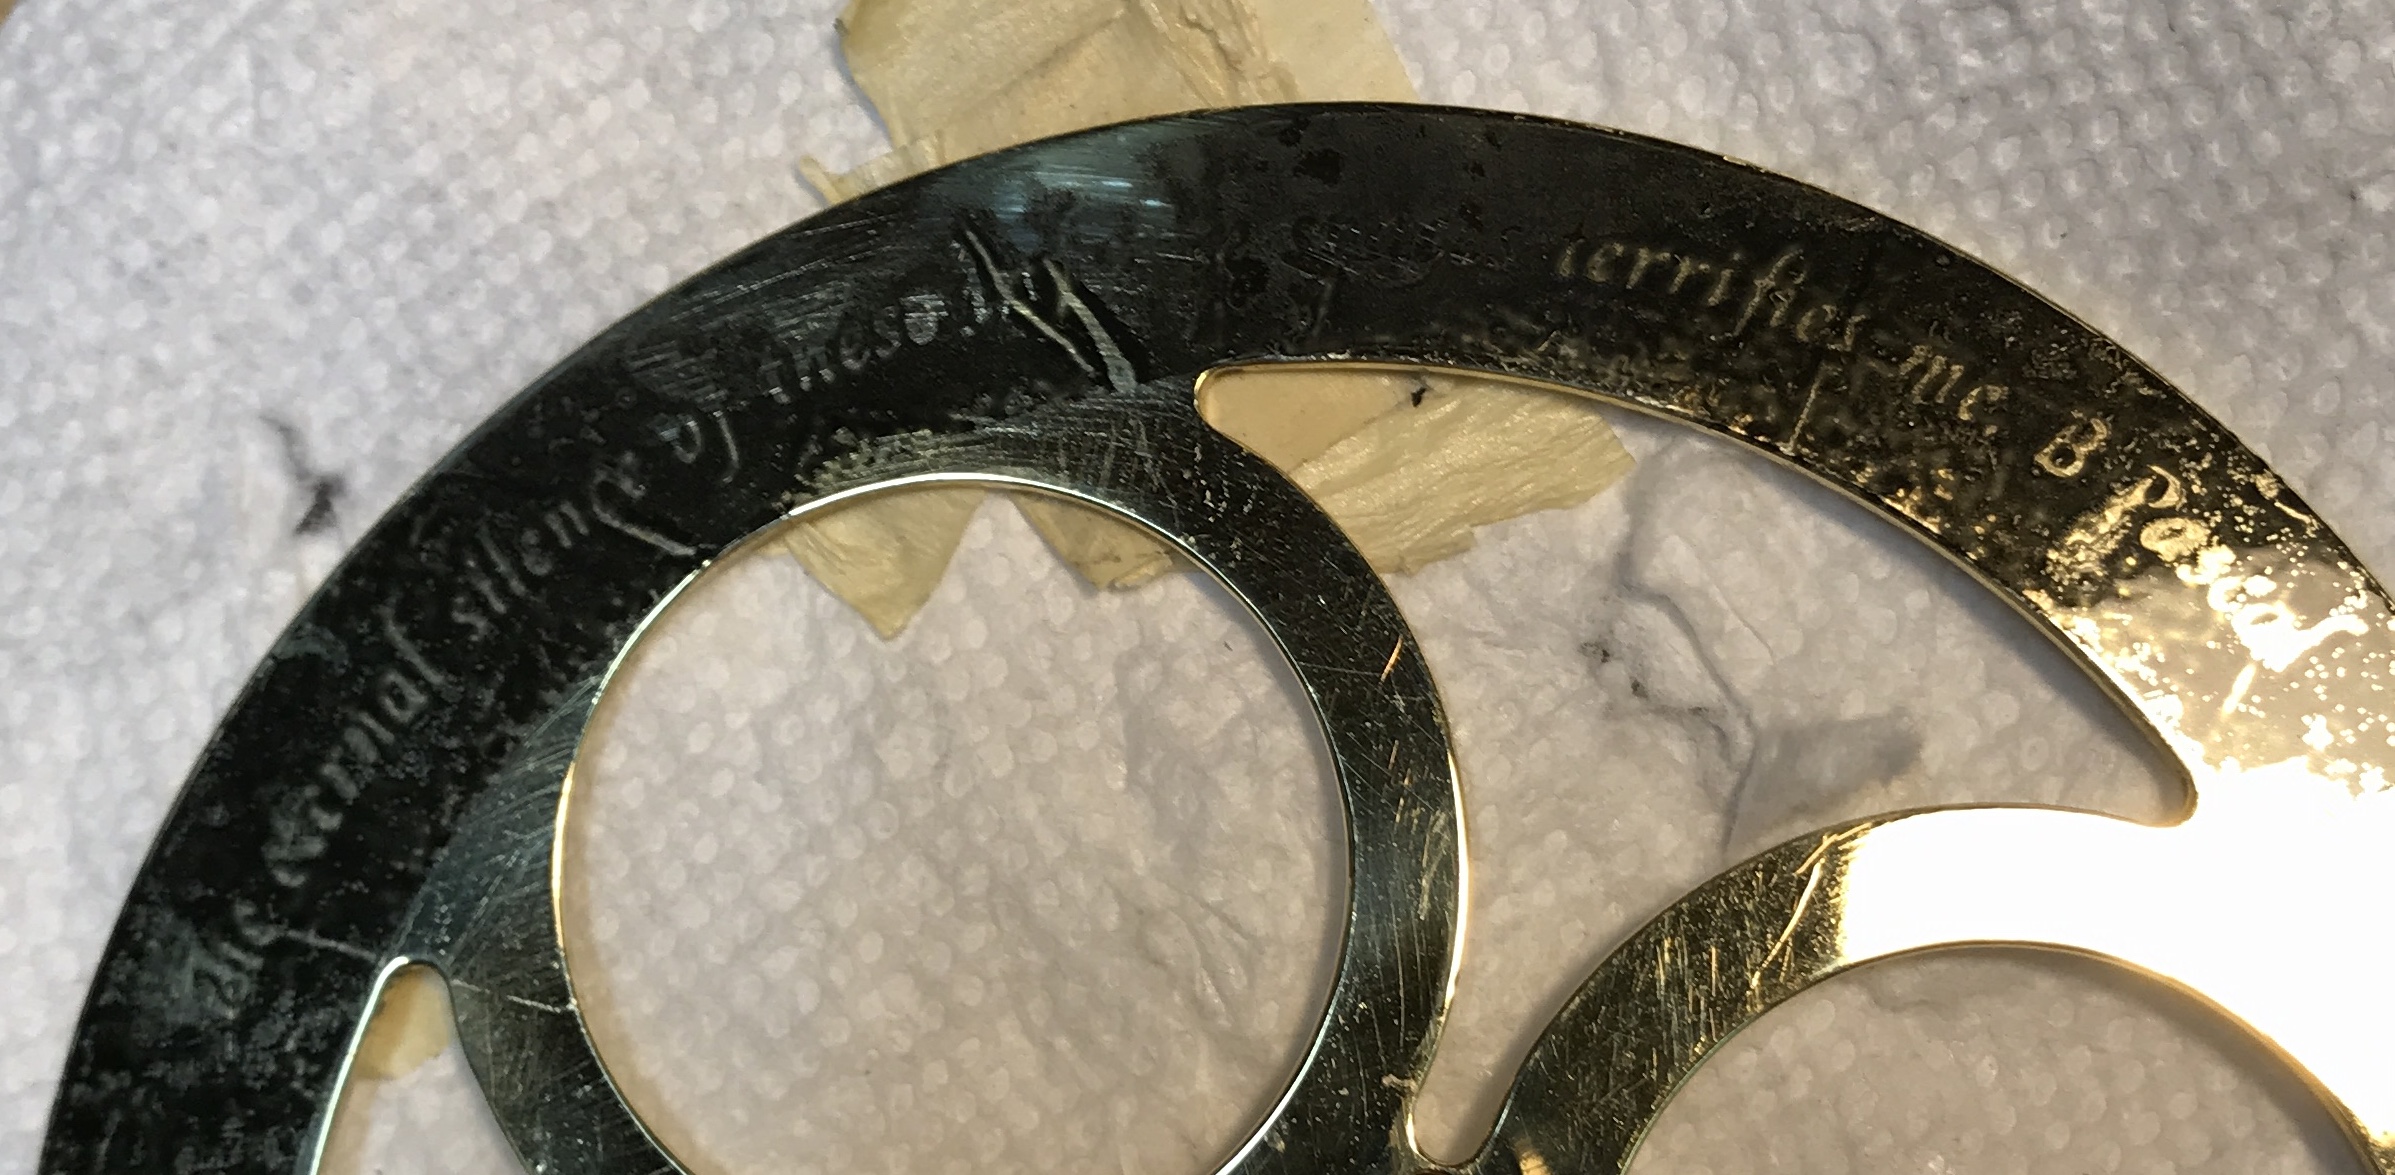
The press was heated to 300° for the now standard 30 minutes. It was removed and separated. The ring was laid on the bottom followed by the cardboard and the top. The whole press was set on the patio, blocks were laid out on top and I stepped up on it for two minutes. Since I knew the pressure would mostly be on two sides of the ring, I placed the ring so the gaps between the two quotes would be at the top and bottom. Then when standing with my feet on the sides, most of the pressure was focused on the quotes. The top was removed and the brass ring was placed on the table to cool. After removing the tape (pain in the ass!) the transfer was exposed. It was a mixed result. There certainly was reasonable transfer. The bubbles did have a negative effect inhibiting transfer in their vicinity. The transfer was also spotty. On the positive side the letters were all well formed. I have attempted to capture this in the following photo. One way to avoid the bubbles would be to tape in both directions from a starting point. When the tape has reached the opposite side the ring can be cut to release any extra prior to completing the taping. The hot press needs to go longer. Three or four minutes should be about right.
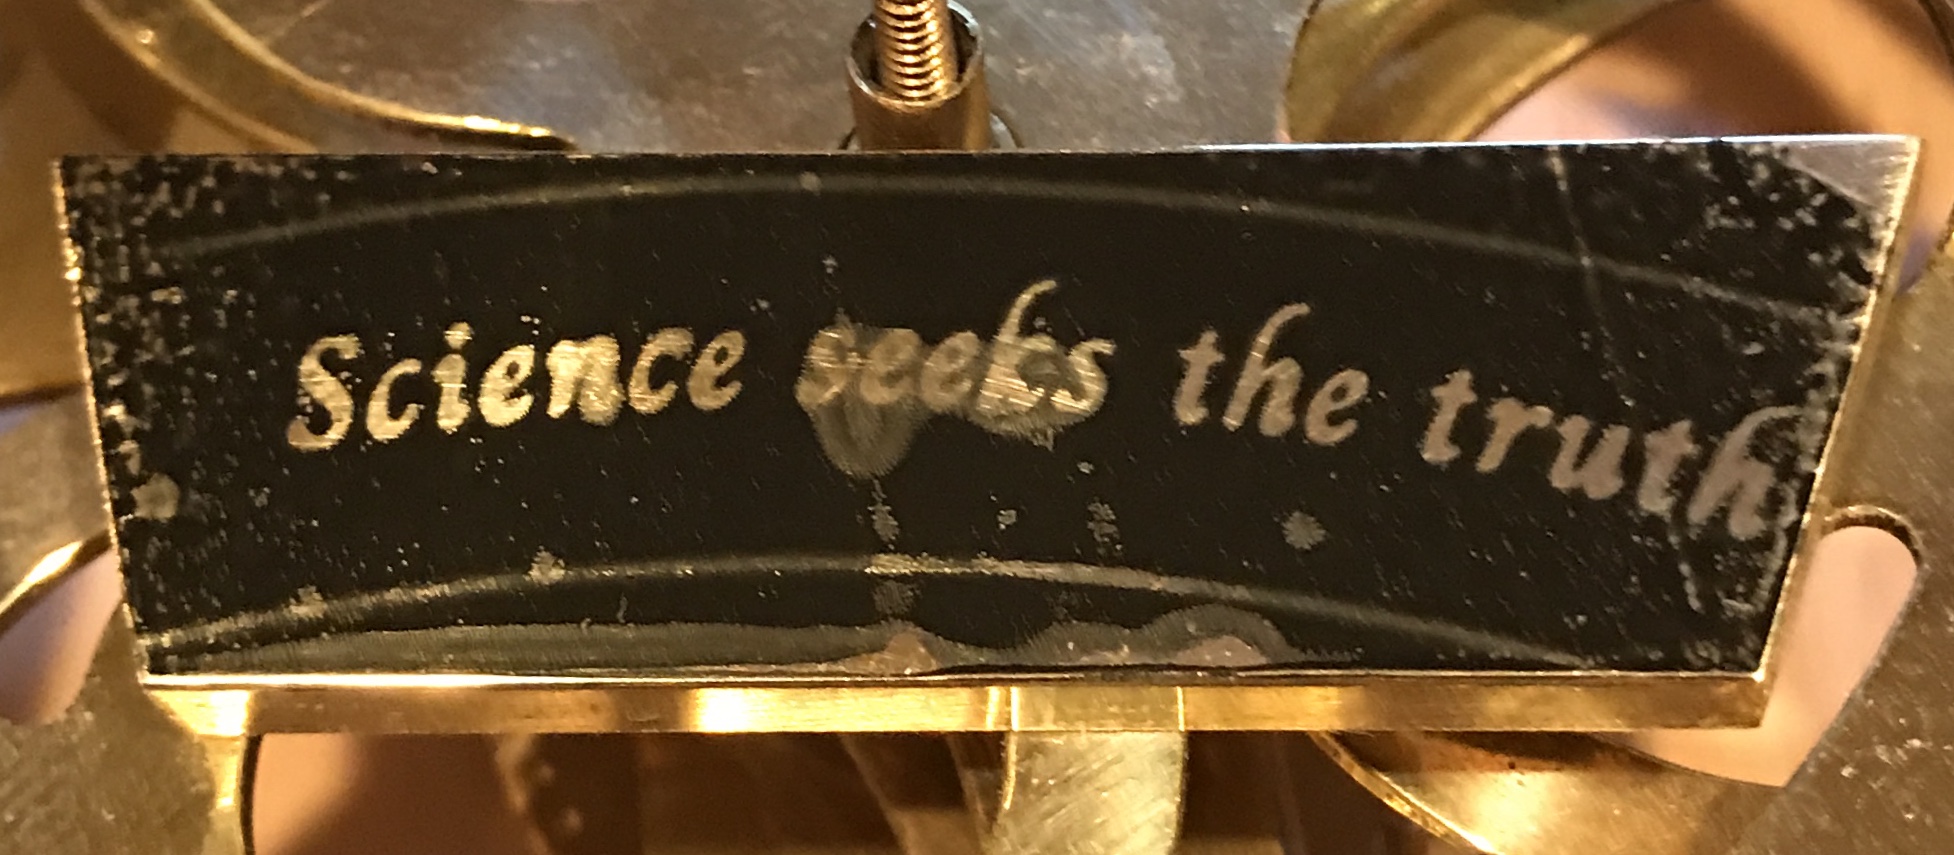
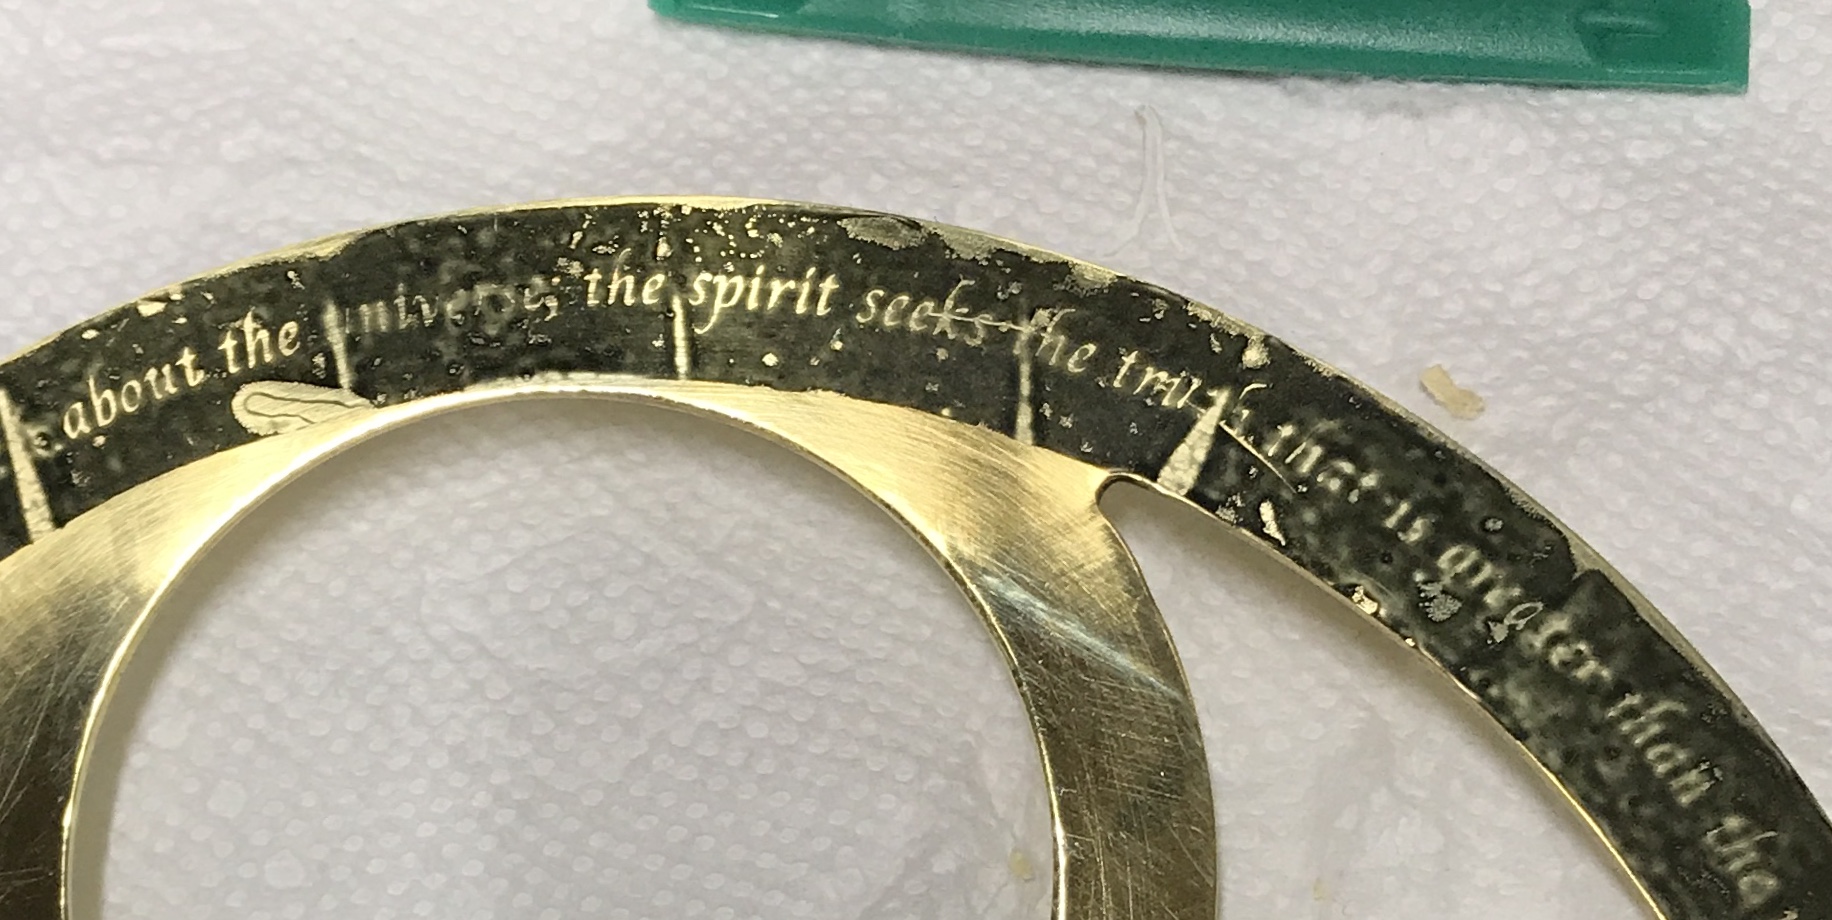
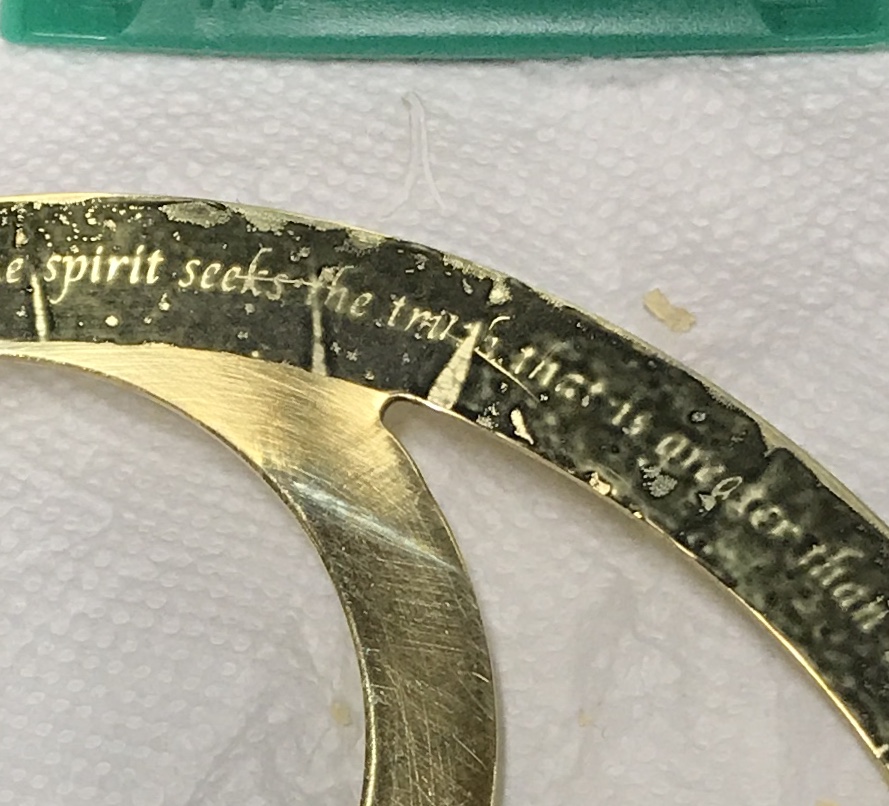
It is now August 2 and time for another experiment. While the press heated I cut out and taped another copy of the Mars ring onto the brass. This time care was taken to cut the ring slightly narrower than the ring and to minimize bubbles while taping the acetate was cut into two parts. Since there was incomplete transfer the last time, the brass ring was heated for three minutes. I stood on two wooden blocks to transfer pressure mostly over the brass. The paper insert was used to even the pressure. After removal and cooling the tape was removed. A very disappointing result. As can be seen in the pictures below some areas transfered well and sharply, though spots where no transfer took place can also be seen. What is worse is the areas where the ink ran. Some of these are adjacent to sharp letters!!!
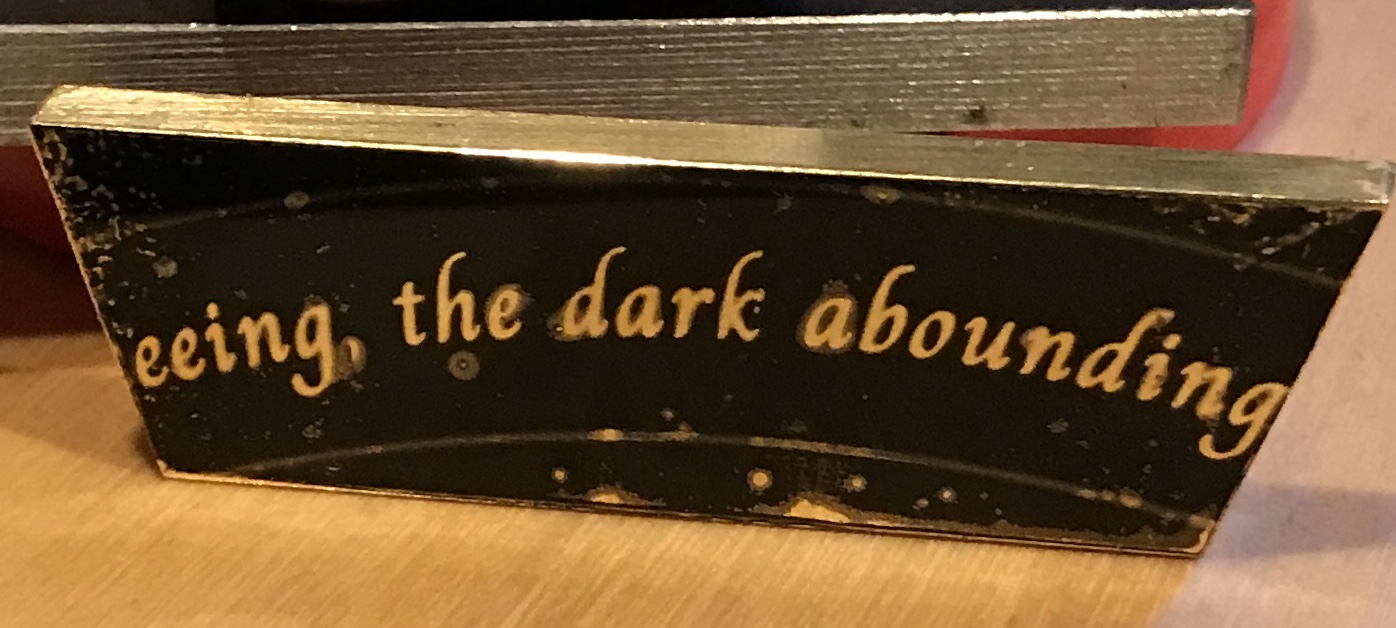
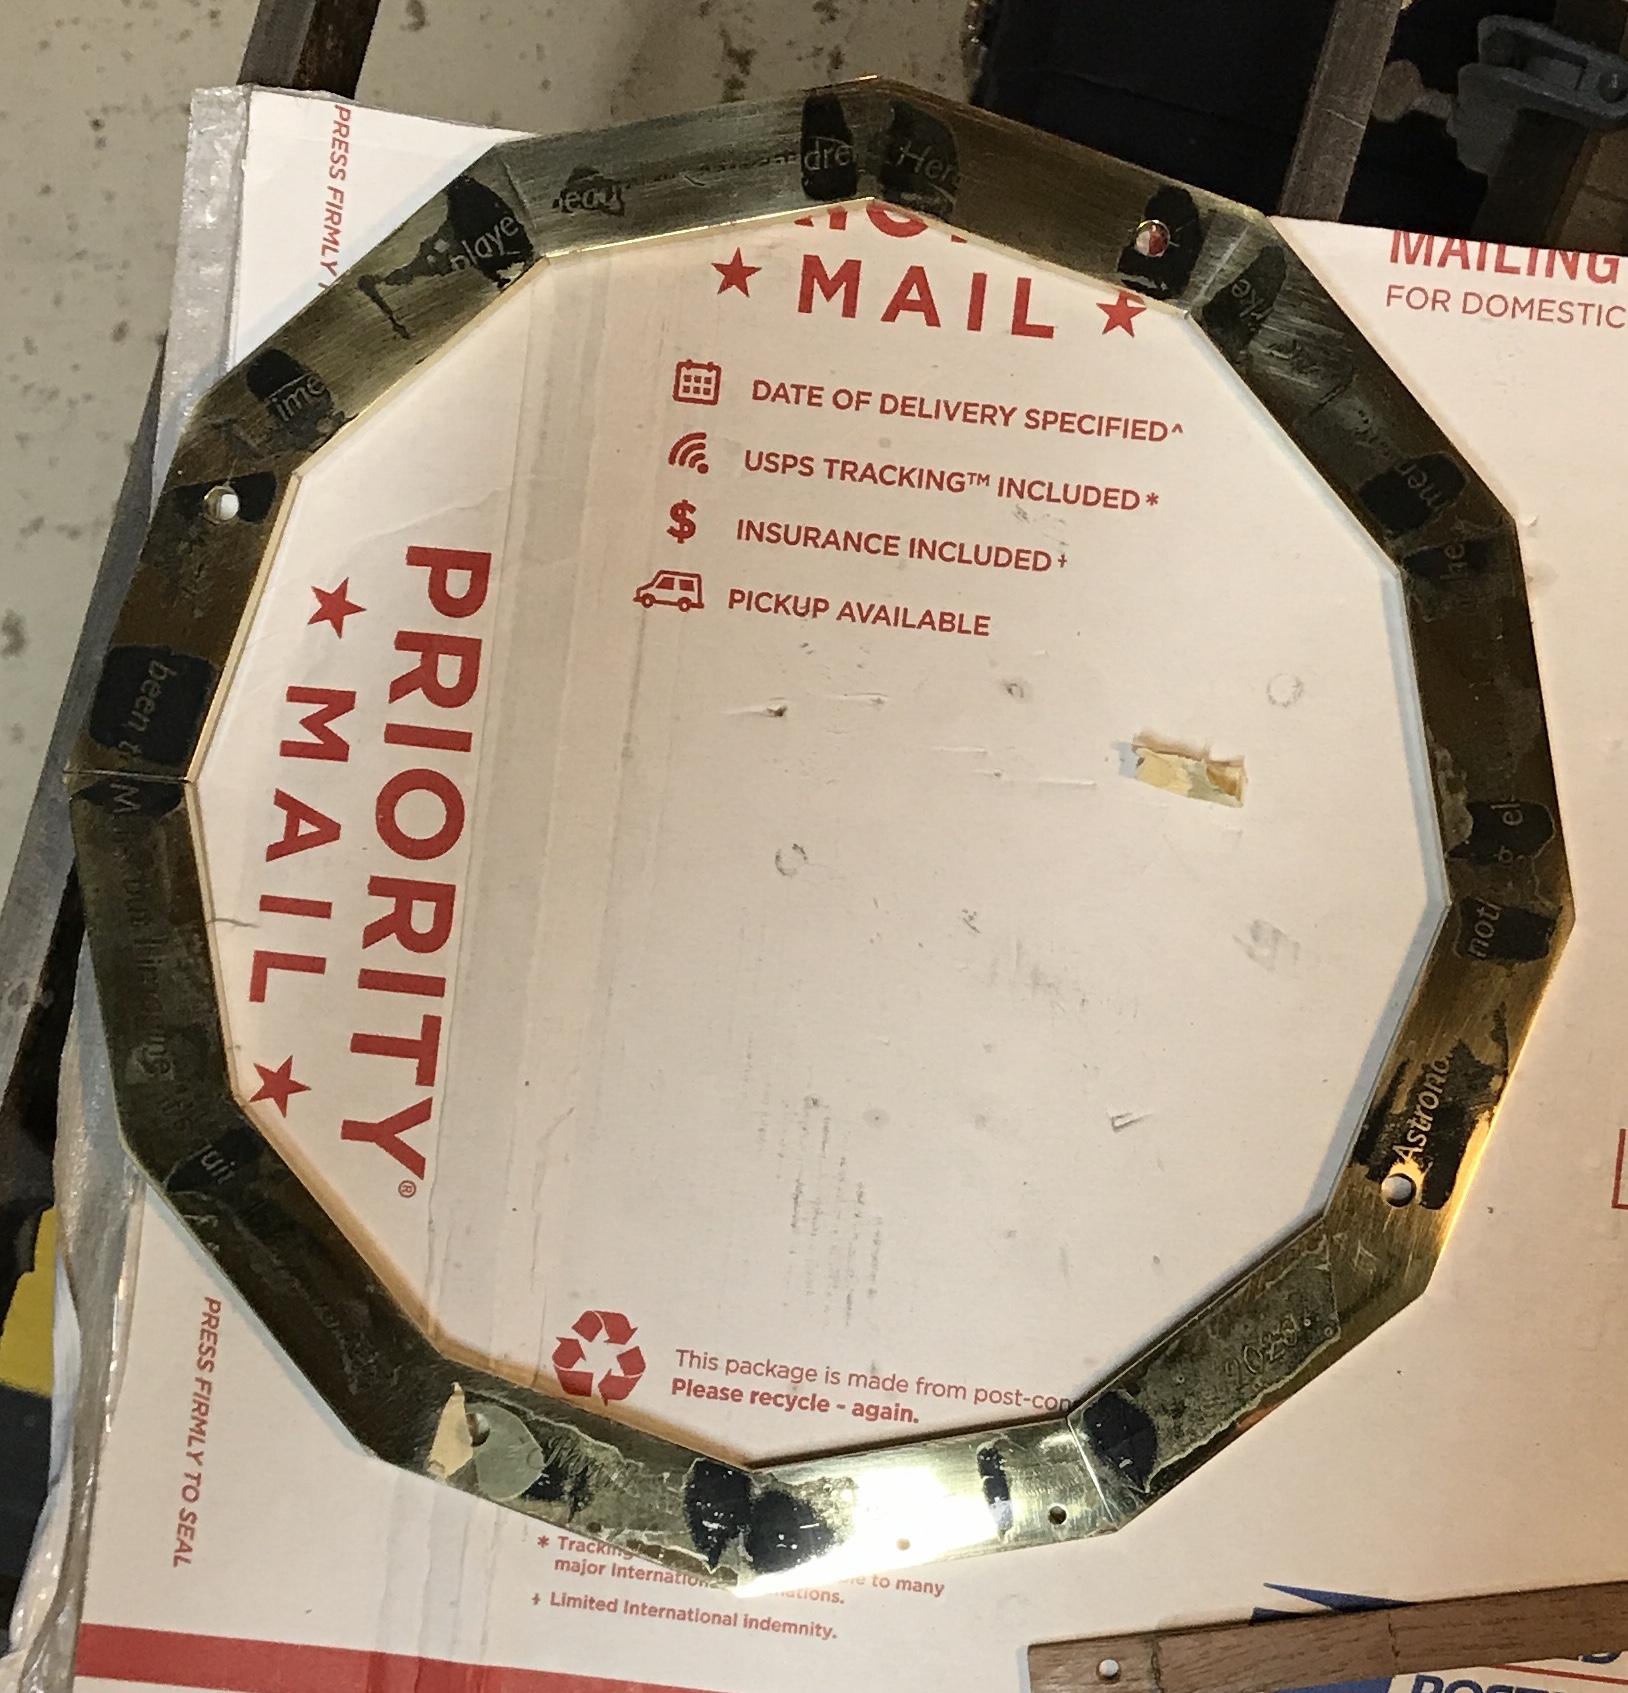
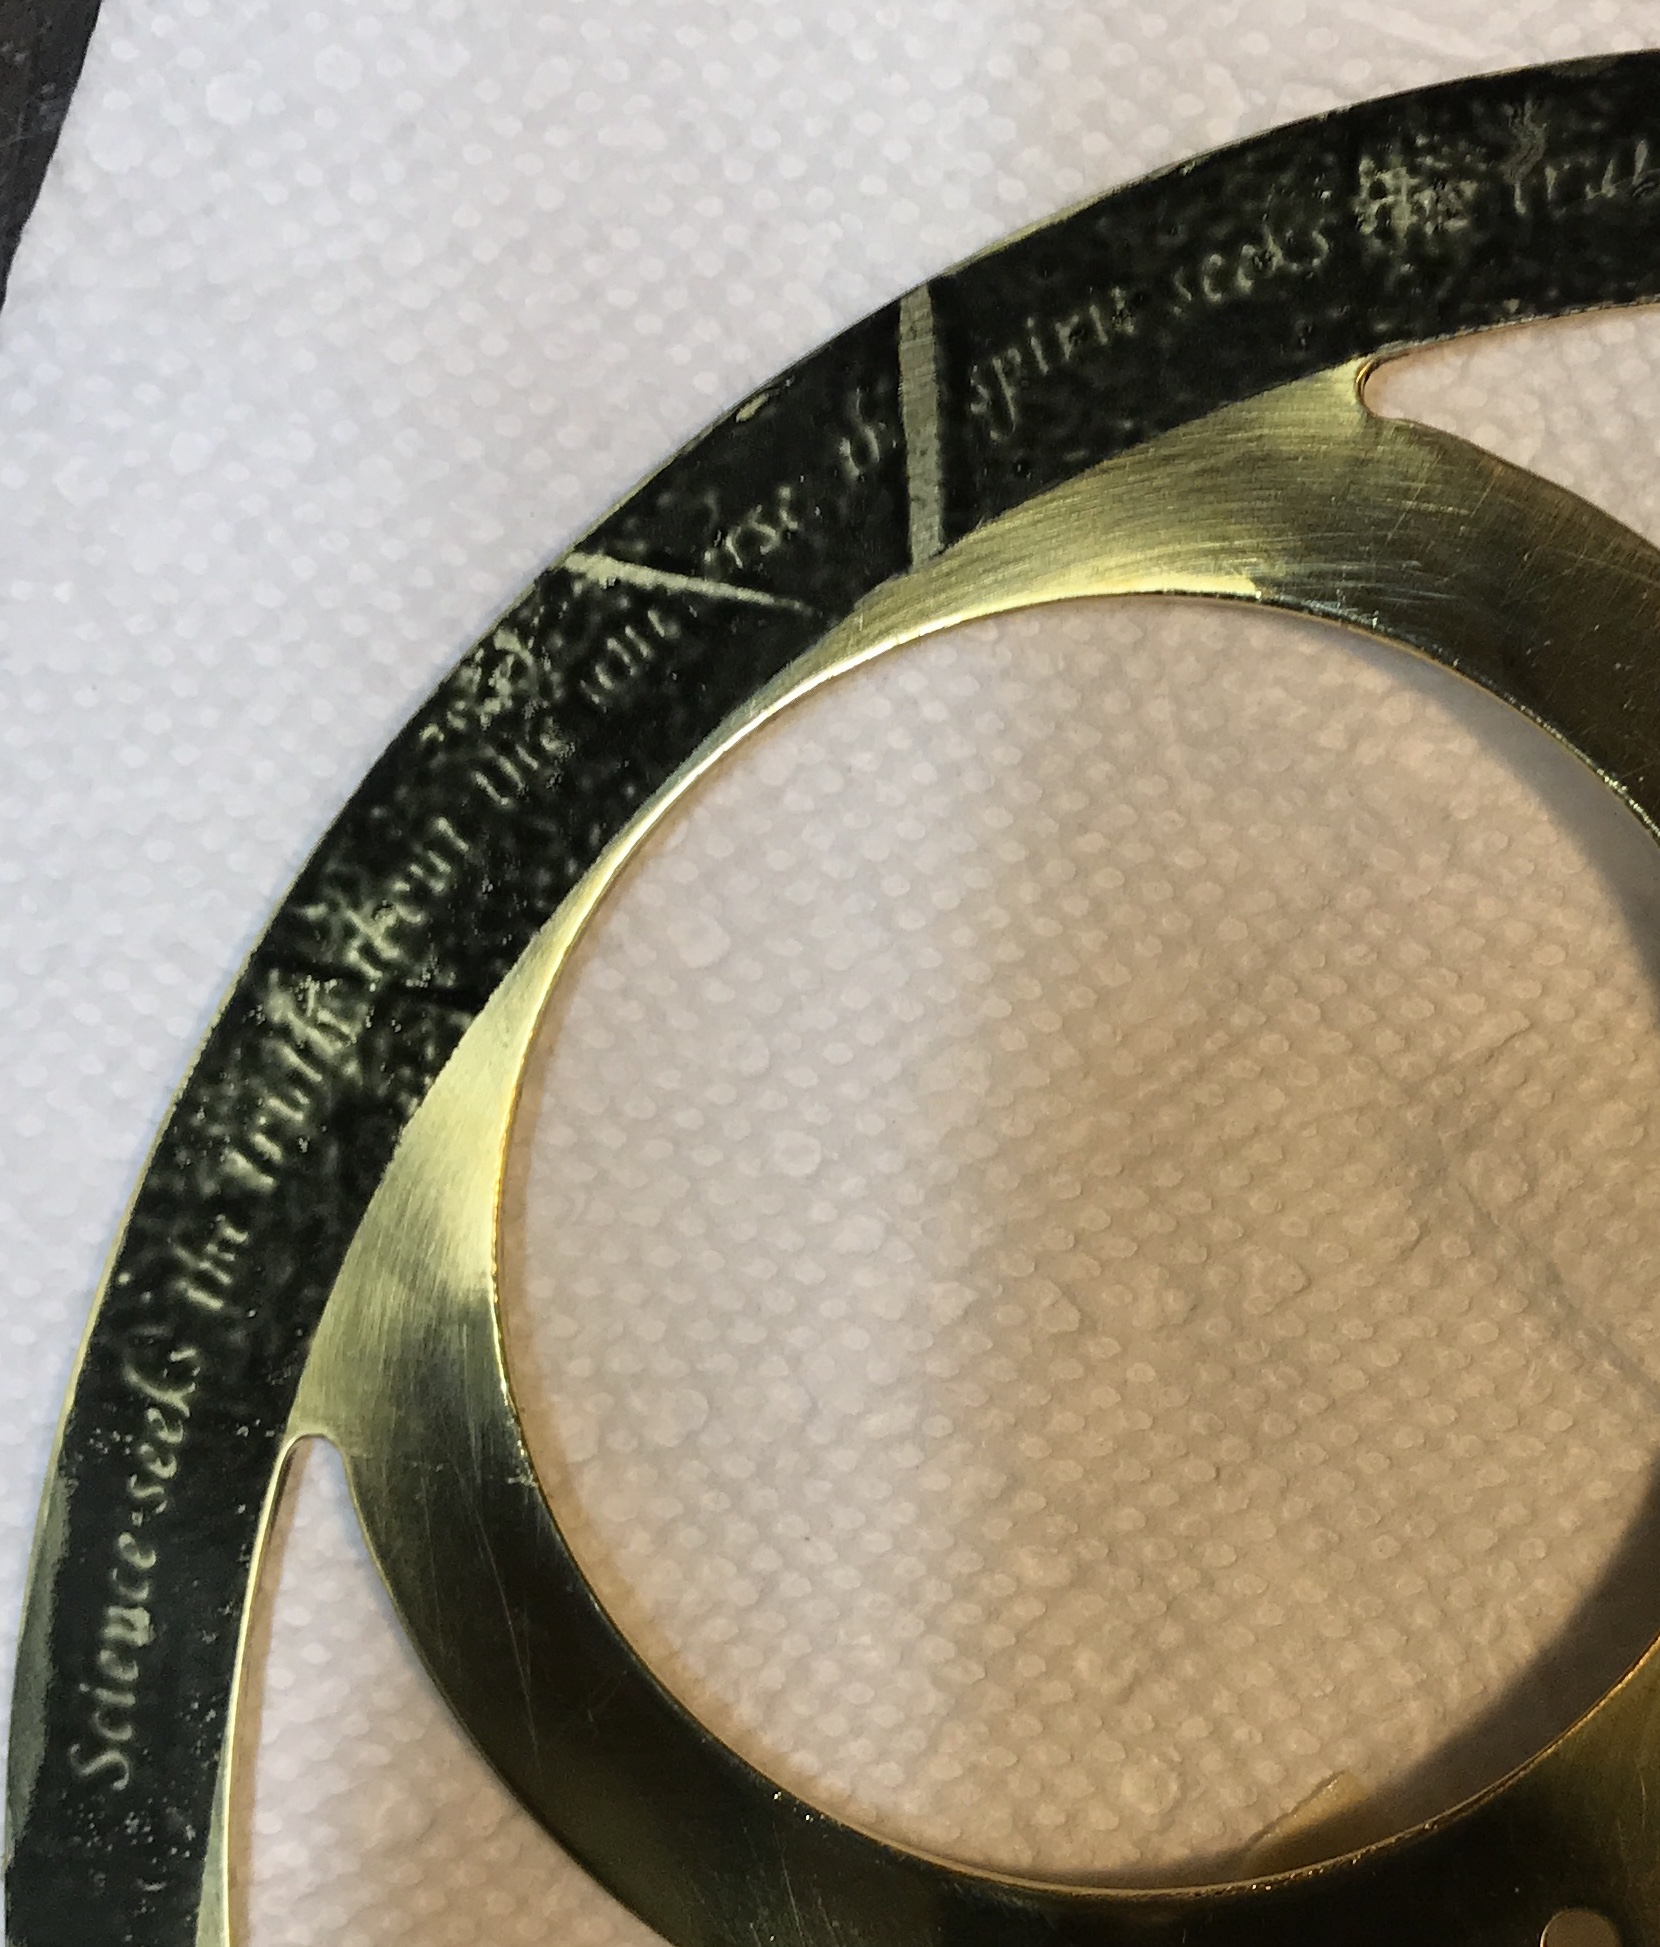
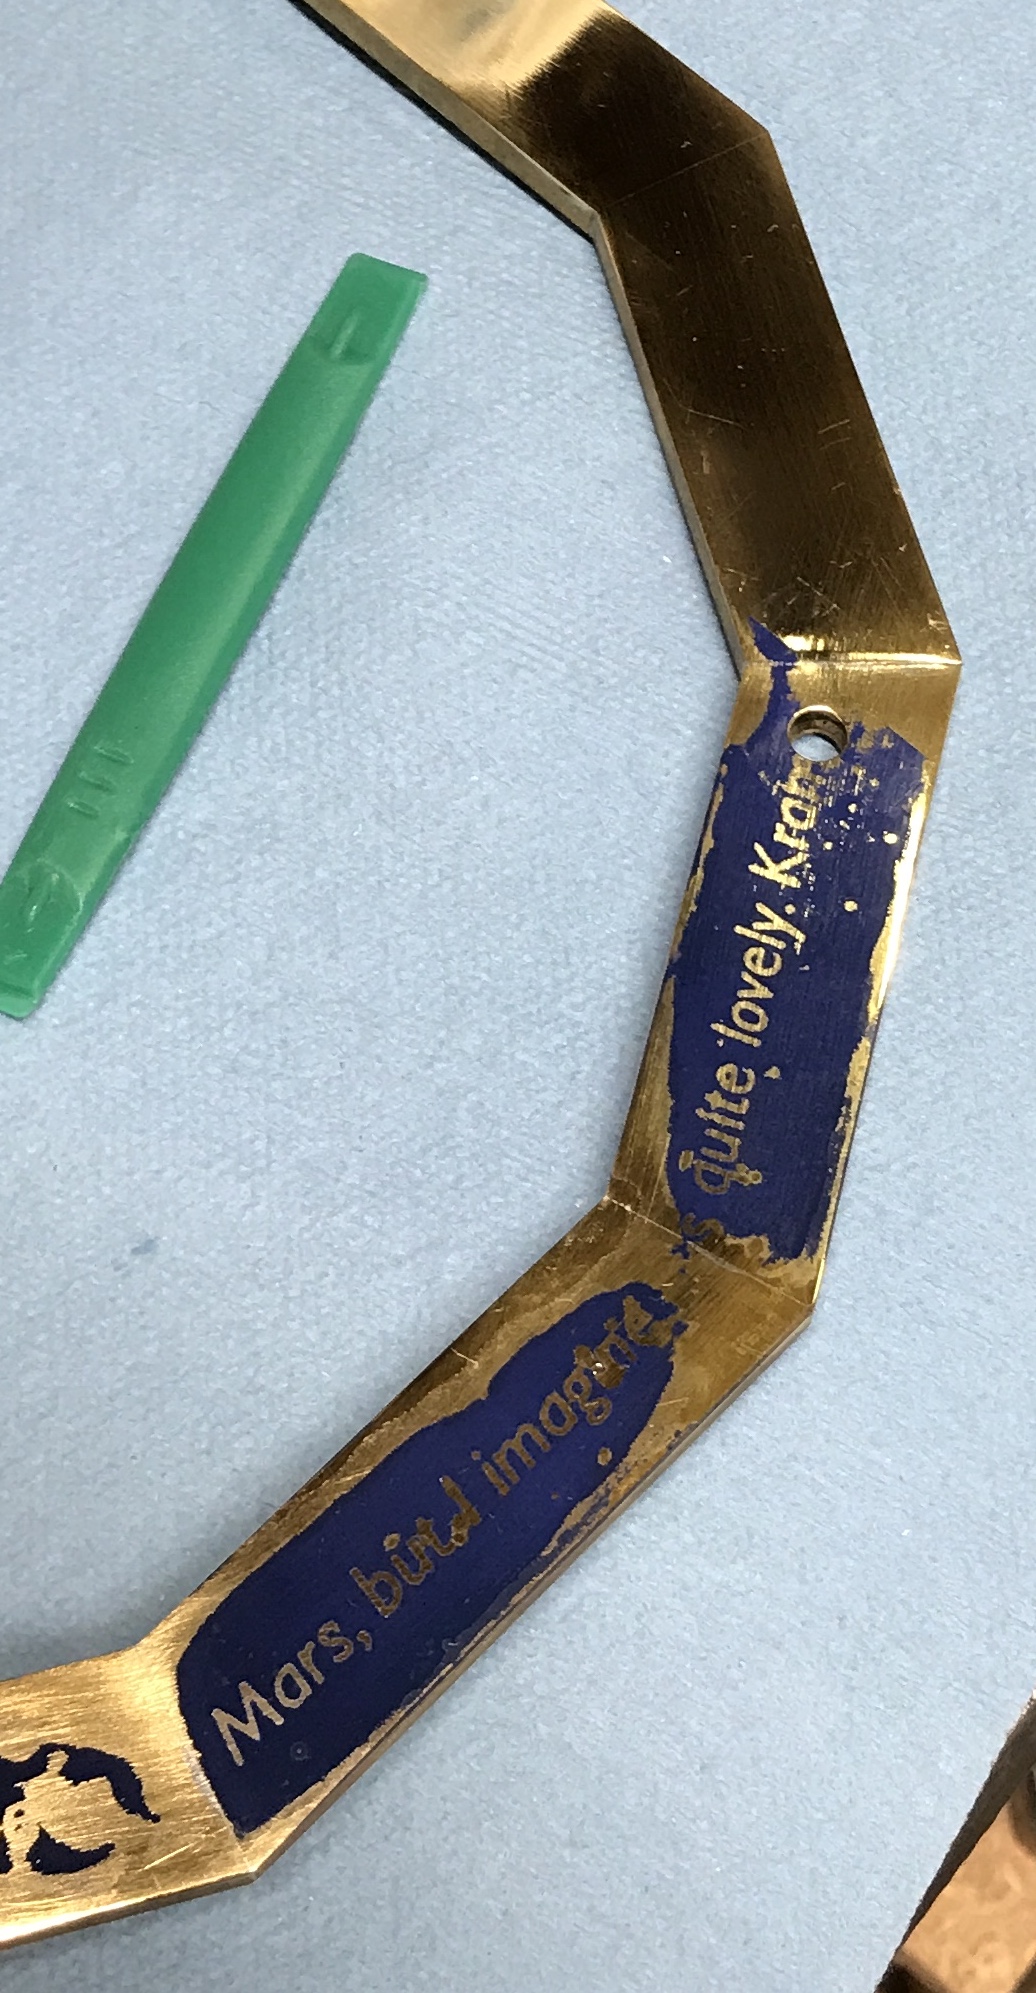
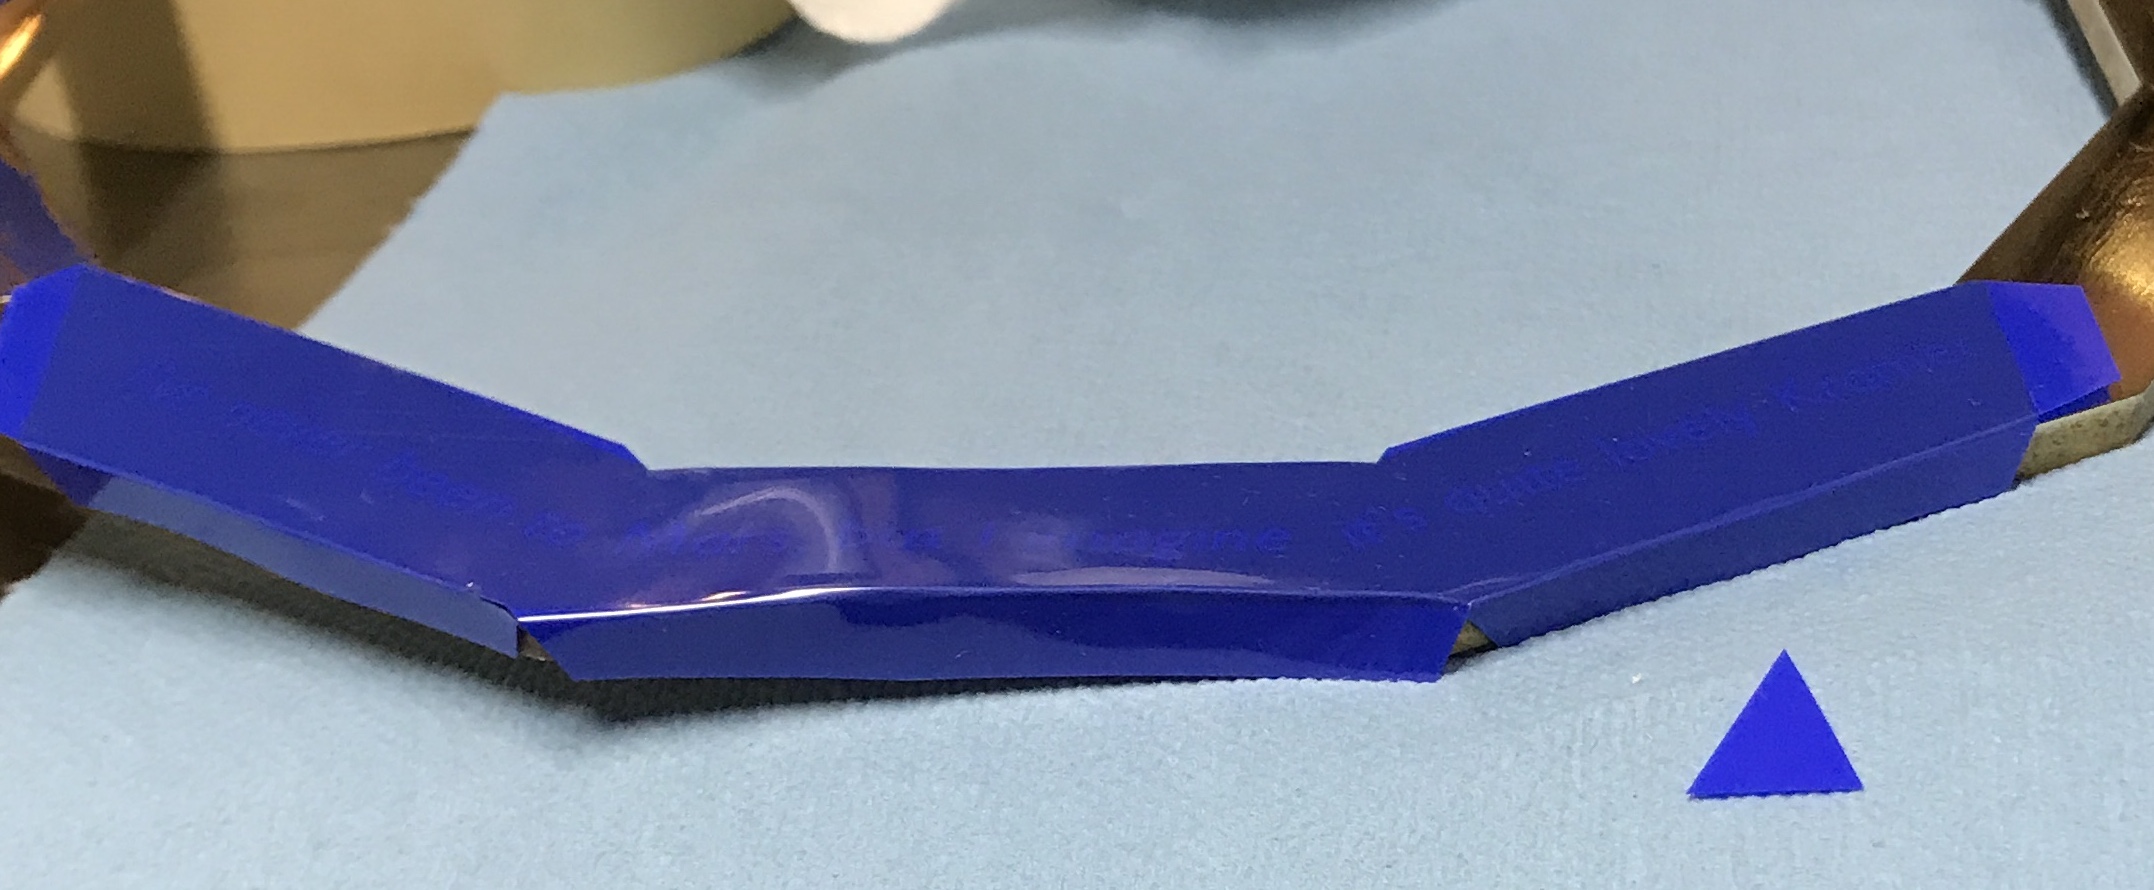
Another attempt was made this morning. Clearly the pressure has not been consistent across the ring, so the transfer is spotty. I decided to drop back a bit and only do part of the ring. So the previous attempt was cleaned off with acetone. A new acetate ring was cut out. Only one half of this acetate ring was used. This quote covers slightly less than half of the Mars ring. Four C-clamps were found, two are deep enough to reach almost to the ends of the acetate. The top plate was marked where the clamps should go. The press was heated to 300° for 30 minutes. The acetate was taped onto the brass ring. The press was removed from the grill and the brass ring was placed on the press with one edge aligned with the edge of the press. The top was put on and the clamps were applied. It probably took about 15 seconds to get the clamps on and tightened. The clamps were left on for 2 1/2 minutes. They were quickly removed and the brass ring was removed from the press. After cooling the tape was removed. Peeling the acetate off revealed probably the best transfer yet. As can be seen in the following picture the transfer was homogeneous across the entire span. The press was clamped too long as can be seen from the flow and fuzzy letters. Again though, this was consistent across the length of the quote. Presumably, if the time is reduced to maybe 1 3/4 minutes there will be transfer without flow. (Notice the two lines where the adjacent tape was not aligned well.)
Another attempt at 1 3/4 minutes still ran some, but not as much as previously. Maybe 1 1/4 minutes or only one minute, might work. I am out of the correct Mars ring quotes, so I will need to prepare another planet ring for tests. The Earth ring was selected. It was polished. During the polishing I explored a few things. An obvious improvement was longer polishing time. This removes fine scratches from the sandpaper. The last process was repeated with a one minute clamping time, plus a little before for clamping and a little at the end for unclamping. The results were disappointing. As can be seen in the picture below. the transfer was great in places, non-existent in places and even a little blurring in places.
Even if I were to get a transfer to work, there will be no reproducibility. I am completely stumped. Nearly all of the videos on YouTube that discuss transfers use heat and pressure. However, I did find one from an engraver. He used a completely different approach. He printed onto parchment paper. He affixed the parchment paper to the metal (steel in his case) and wet the back of the parchment paper with acetone from a Q-tip. He rubbed the parchment paper with the back of a spoon. You could watch the ink leave the parchment paper as he rubbed it. When finished a very detailed design had been transferred to the steel in preparation for engraving. In order to print on the parchment paper with a laser printer he taped the parchment paper fragment to regular paper. I assume this is so the paper has enough stiffness to be pulled into the printer. Rhea will order parchment paper from Kroger for pick up tomorrow.
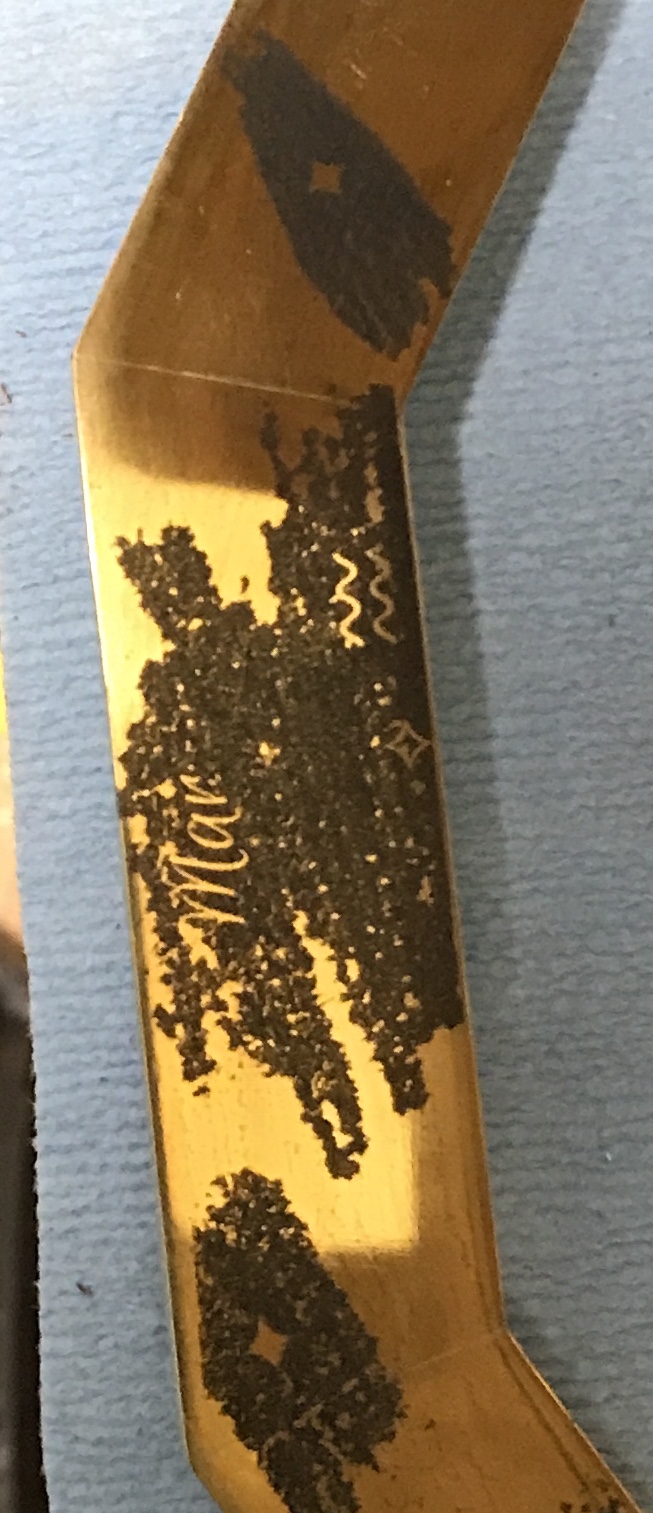
Got the parchment paper. I took printouts and parchment paper to Office Depot. The less than adequate printer jammed on the first page. I spoke with Erin and she agreed to try it on her printer at work. I took a whole package of printouts and parchment paper to her. I picked a few of the better printouts this morning. This afternoon I tried them out. The transfer was simple enough with a couple of caveats. No acetone can get under the printout as that dissolves the ink. So a wide margin, 1/4", needs to surround the area to be transferred. The acetone needs to soak in a little before rubbing. I found rubbing with the edge of the spoon with significant pressure gave the most uniform transfer. Unfortunately, the ink in the final product is just not dense enough. I am sure it is fine for engraving, but not for etching. The picture below captures the "grainy" coverage.
I thought back to my etching class at the Indianapolis Art Center many years ago. I still have a few notes. In that class we used blue "PnP" paper. I looked up PnP paper on the web and discovered one company that sells the stuff: Techniks Press and Peel. They sell it for circuit board makers. The PnP paper has some blue coating on one side that is printed on and releases the ink upon ironing. I purchased a package of twenty sheets for $40 with shipping. The PnP paper arrived today.
I went back to the various pdfs, pngs and idraw images I have saved over the many iterations of this project. For each item (or part of an item) I copied the image in Preview from the png, pasted it into Graphic, scaled it as needed, multiplied the image, and exported it back to a png file. The only one I did not go through this process for was the planet rings as they already fill a page. The PnP is expensive so that is why I want multiple images on each page. This produced nine files that I will either print here and copy on PnP or print on PnP at Office Depot.
The files were printed here and the resulting nine pages and nine pages of PnP were taken to Office Depot yesterday. For $1.28 I got the copies printed onto PnP with a laser printer. Unfortunately, the guy doing the copying did not copy one of the pages and I will need to return to get the last one printed on PnP, if I can get this to work.
I am convinced that the problem lies in heating the metal evenly and to the correct temperature. The PnP instructions specify 275° to 325° temperature for the iron. They say this is between "acrylic" and "polyester" on most irons. Using an iron to transfer from PnP to a 1/16" thick sheet of metal should be straightforward. The iron should be able to heat the metal that is only this thick. The thicker frame parts on the other hand need a different approach. I think these parts need to be preheated to 200° to 250° before applying the iron.
Two attempts were made this morning. The PnP was cut around a frame quote leaving 3/16" of plastic around the ink. The corners were removed so the extra would fold up the sides. The sides were creased along the edge of the ink. This was then placed on the frame and held with masking tape on the back side. The grill was heated to 235° and the frame with PnP was placed on the pizza stone for 7 minutes. The iron was turned on. Unfortunately, the only setting below "wool" is "synthetic silk". I guessed and picked a setting on the low side. After ironing for 3 minutes the brass was quenched in running water. I took a look under one end of the PnP. There was no transfer whatsoever. The brass was returned to the grill for 7 minutes and the temp of the iron was increased. After ironing for four minutes the brass was cooled with water and the PnP was removed. The picture below shows this first attempt. The second picture shows how the PnP is taped to the brass.
Two things were changed for the second attempt. The grill was heated to 250° and the iron was set between "wool" and "synthetic silk". The picture shows some good transfer, but some poor transfer as well. The third attempt went for even more heat. The gril was heated to 275° and the iron was set at "wool". Care was taken during ironing to iron each of the three segments individually for 1-2 minutes. After cooling with water the tape and plastic were removed. Pretty successful. Still a few glitches, but I expect this to improve with practice.
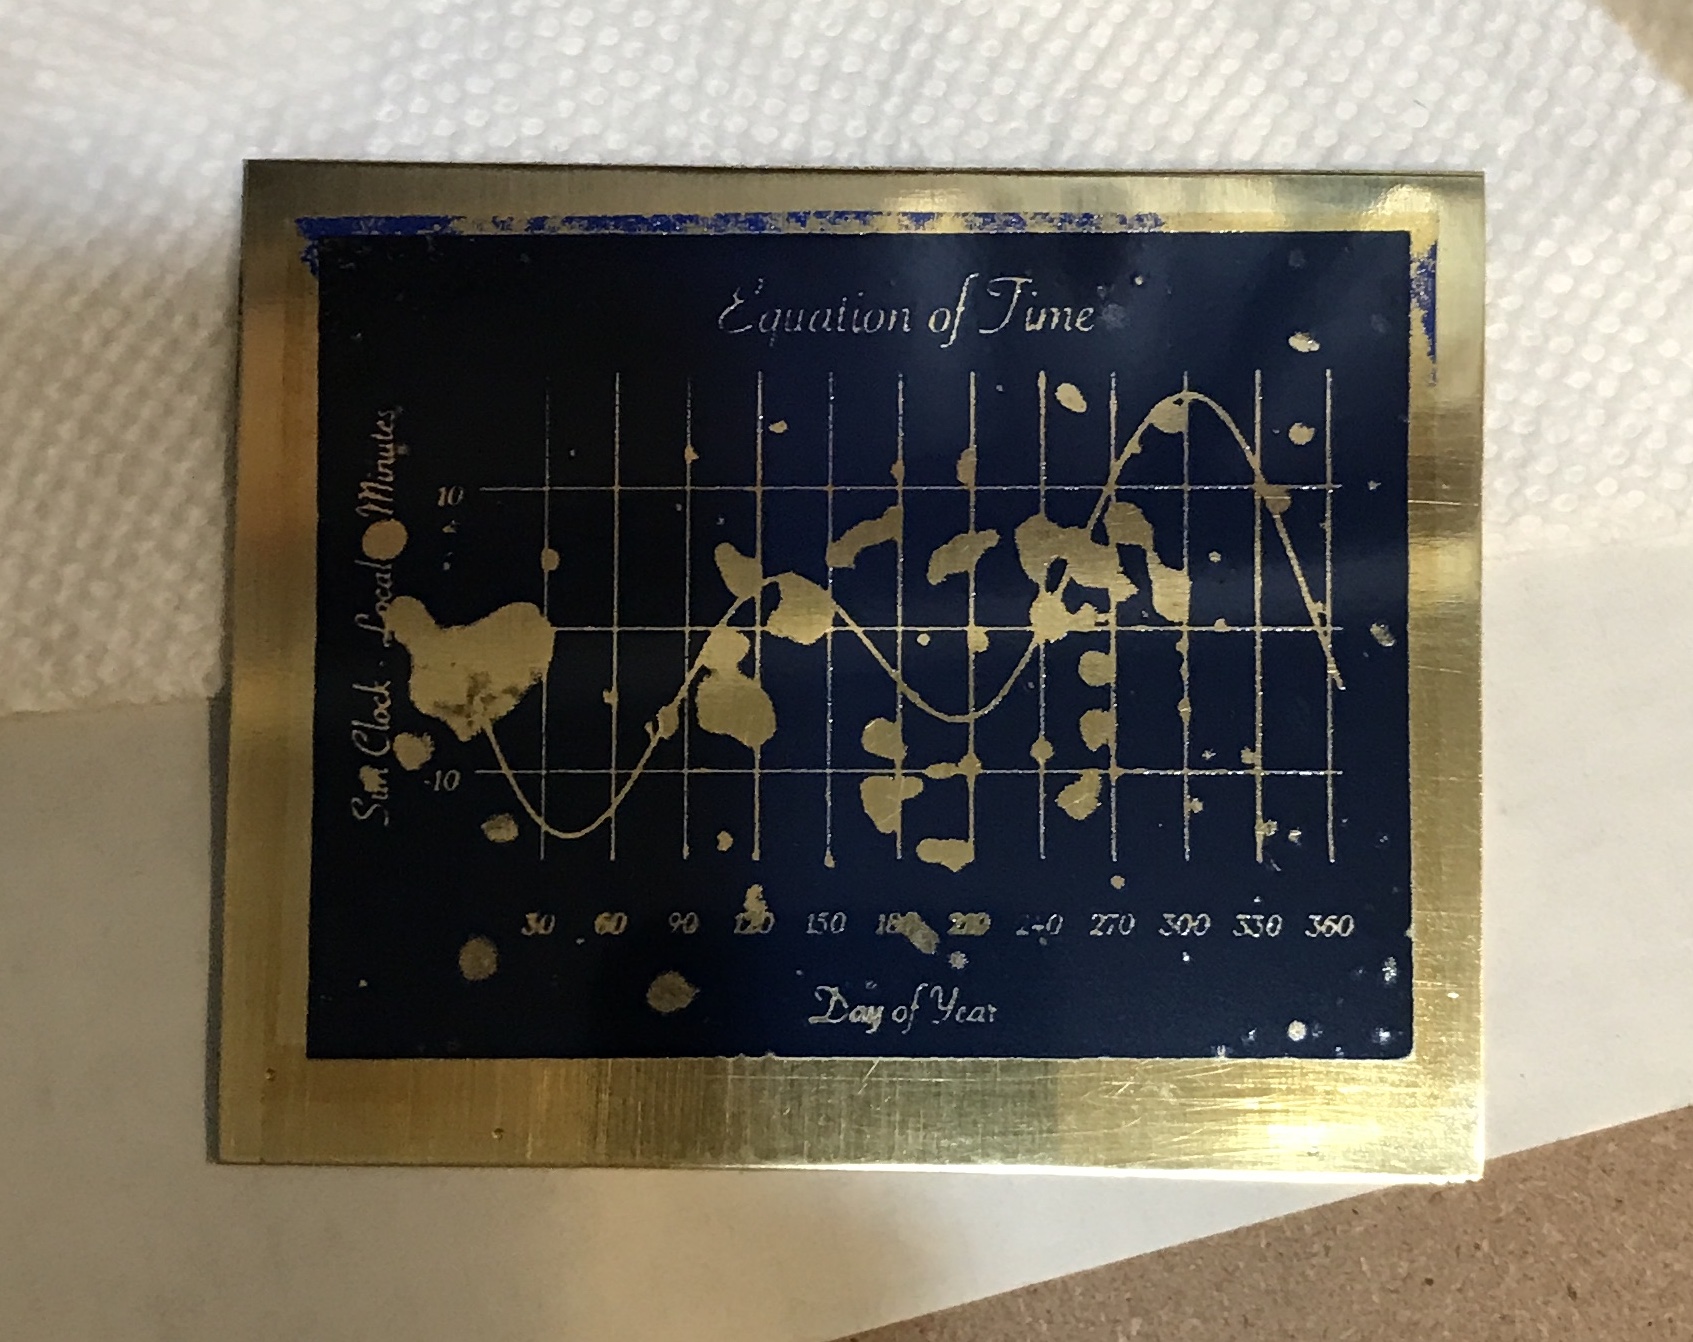
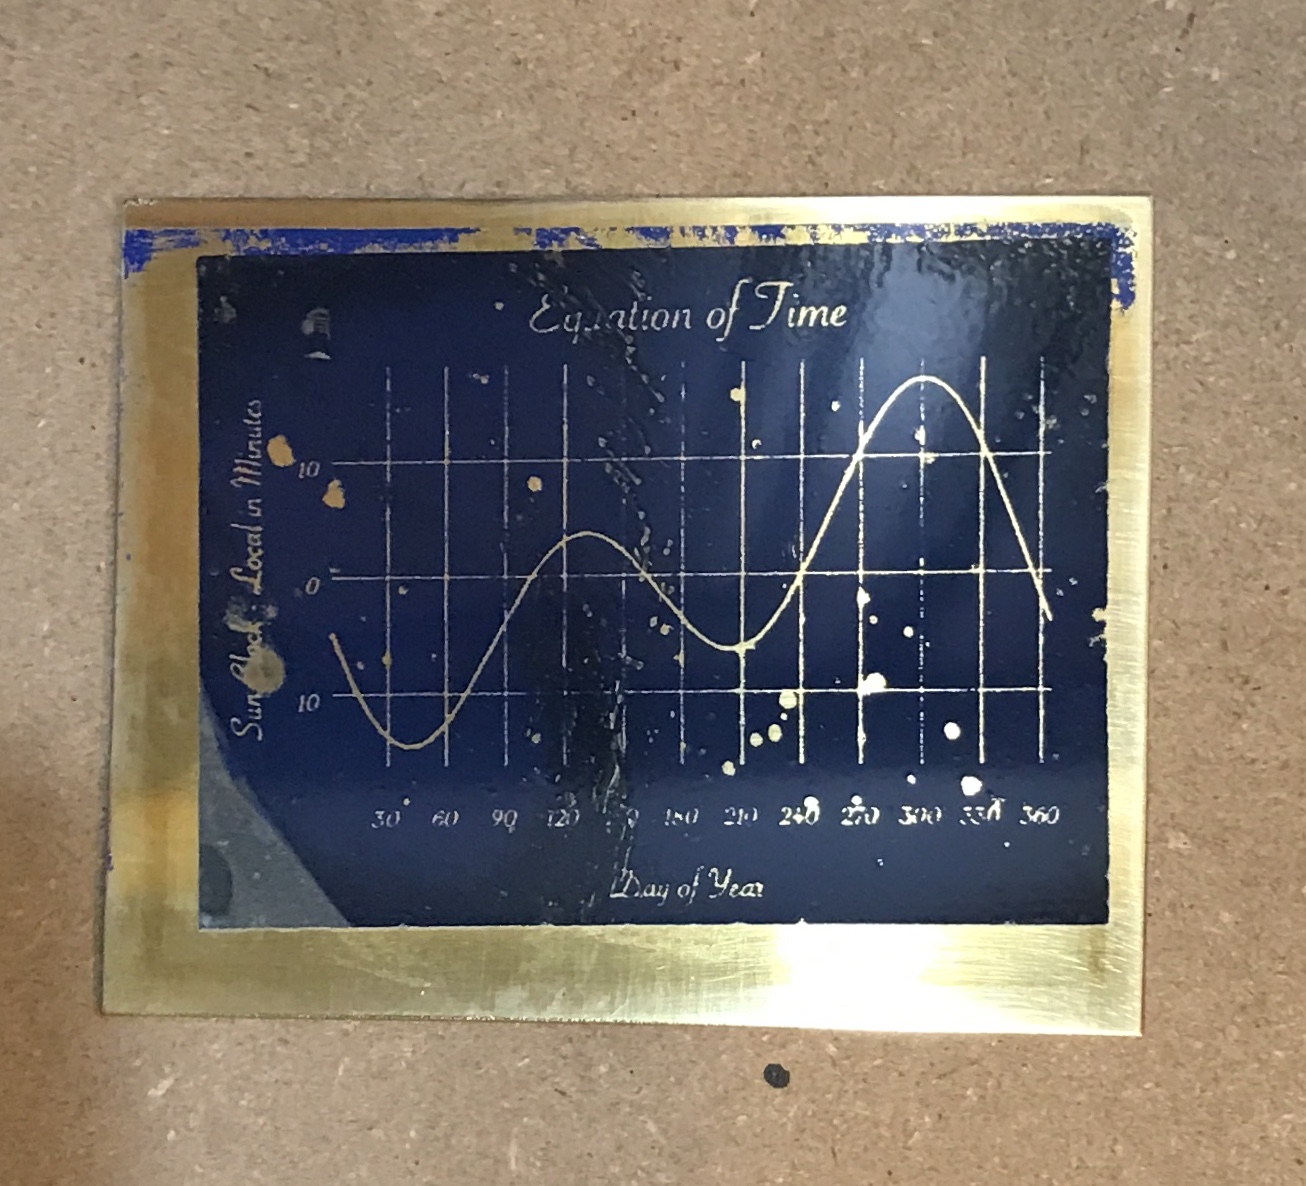
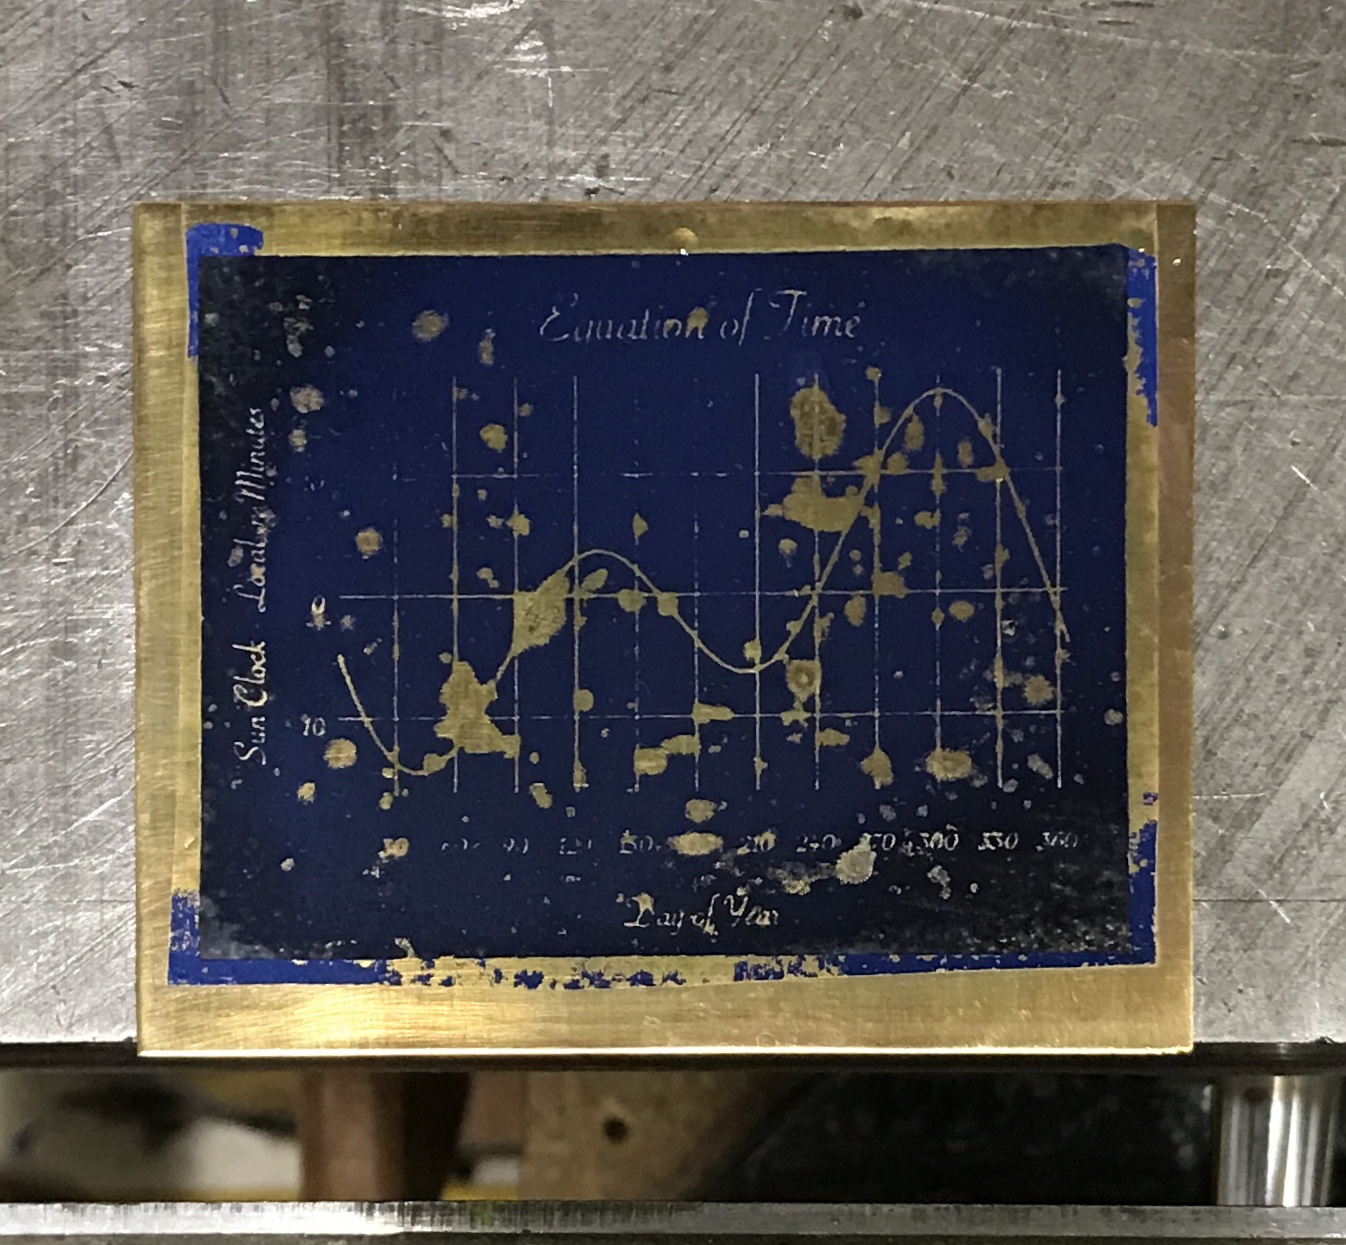
I decided to switch to a plate to be etched for the sun clock. It is on 1/32" thick brass. This should be easier to heat to the appropriate temperature. The plate was heated to 275° on the grill (needed two burners on low as the temp outside was about 55°) for five minutes. The plate was first scrubbed with #00 steel wool per instructions and cleaned with soap and water. The plate was removed from the grill and placed on a board. The image was laid on the plate and a sheet of paper was laid on top. With the iron set at the 'l' in 'wool' it was rubbed across the plate for 3 minutes. The first image below shows the result. Not great. The second attempt had a few changes. The plate was heated to 300° and the iron was set at the 'w' in 'wool'. The iron was held on the plate for five minutes. The second picture shows the drastic improvment. A third attempt was made. The grill was a little hotter, 315° and pressure was used on the iron. This plate (third photo below) turned out worse than the previous plate completely confusing me. Maybe the entire ironing process needs to take place with the brass plate on the hot steel plate.
After a two month delay I am refocusing on etching. The obstacle posed by using already heated plates and brass is bubbles. No amount of scraping with a credit card would remove the bubbles. They seem to be trapped! A potential way around this latest obstacle is by rolling the printout onto the heated brass. To this end a roller needs to be made.
Six inches of 1" steel hex was chucked in the Sherline. It was center drilled and faced using a half tailstock center. It was then turned down to 1" diameter except for the end held in the chuck. The end was drilled and reamed to 5/16" for a 1" depth. This work was really beyond the limits of the Sherline. I should have used the South Bend, but it was below freezing this morning. The work was flipped and center drilled. It was faced and the remaining hex was reduced to the 1" diameter. Finally, this second end was drilled and reamed to 5/16" for 1". A final pass on the South Bend was needed along with sanding to get a smooth finish.
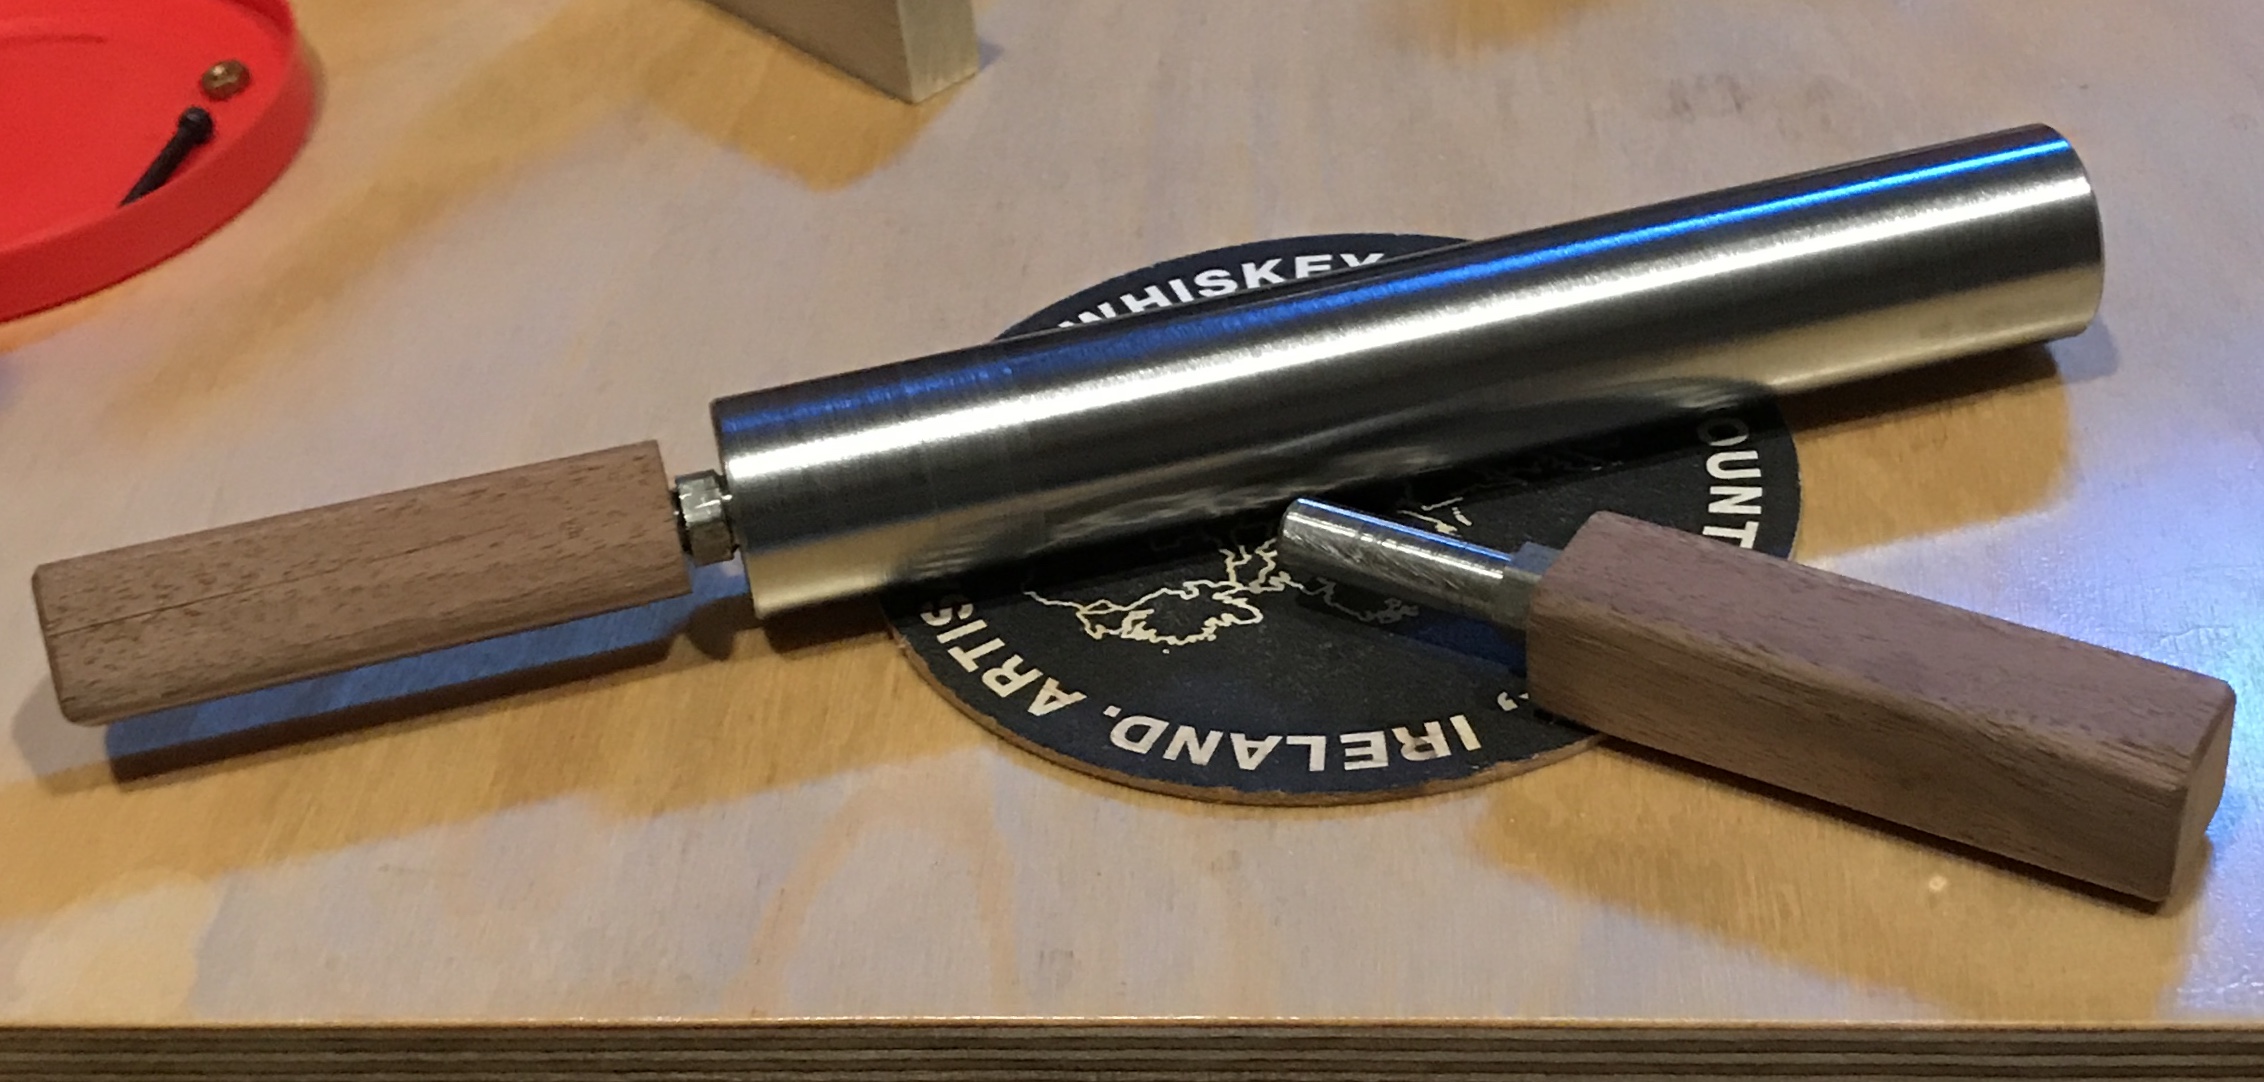
Two handles were made. Two 2" lengths of 3/8" steel hex were cut with the hacksaw. They were individually held in the chuck and faced. Each part was reduced to 5/16" for 1". The parts were flipped and reduced to 0.25" for 3/4" and then threaded 1/4-20. This left a small section of hex. Wooden handles were made from walnut. Two 3"X5/8"X5/8" lengths were cut on the table saw. They were drilled on one end 3/4" deep with a #7 drill and threaded 1/4-20. After chamfering the corners and minimal sanding all parts were finished. A picture below shows the completed roller.
Tried the roller out today. The grill was heated to 300° with roller and brass dodecagon. The pizza stone was removed with the roller and dodecagon and set on wood on the patio table. A strip of transfer material was held on one end against the dodecagon. Rhea used the roller to press the transfer paper onto the dodecagon, while I held the other end up. The roller-transfer paper combination was too slippery and the roller did not roll. It also did not stick or transfer any of the blue ink. A second attempt was immediately tried. I used the roller more as a scraper and just pushed the roller along the transfer paper. This one actually transfered reasonably well.
A few takeaways: the roller did not roll, the transfer paper did not immediately stick to the dodecagon, just pressing the hot roller against the transfer did transfer pretty well, and it was a challenge aligning the transfer paper with the dodecagon. Getting the initial end aligned and pressed down is a necessity. The hot roller then works pretty well. This might work if initiation can be routinely done well.